What a dead pixel photo really is on modern cameras
A dead pixel photo is any image where one sensor pixel fails and shows up as a tiny, distracting dot in the same place on every frame. When a single pixel dead on the sensor repeats as colored specks across many images, beginners often confuse it with dust, normal noise, or a dirty screen. That confusion grows when the defect only appears on a dark full screen test image and not on every bright display or monitor, or when a bright dot seems to float on one LCD panel but not on another editing screen.
On a digital camera sensor, a dead pixel is a photosite that no longer responds to light, while a hot pixel is one that stays stuck as a bright dot or cluster of bright dots even in deep shadow. Both dead pixels and hot pixels show up as tiny white dots, red dots, green dots, or blue dots that stay fixed in the same position from image to image, which is why a careful pixel check across several test screens is essential. By contrast, random noise moves between frames, so if the dot shifts when you repeat the pixel test, you are not dealing with permanent pixel defects on the sensor but with normal noise, dust, or a display artifact on a particular monitor.
These defects become obvious when you zoom a full image to 100 percent on a calibrated LCD monitor or high resolution laptop screen. On a small camera display the dots may look like harmless dust on the glass, but on larger monitors or a 4K television the same pixel defects can ruin a carefully composed landscape or portrait. Understanding how a dead pixel, a hot pixel, and general sensor noise differ is the first step toward protecting your dynamic range and keeping every dead pixel photo under control instead of letting a single bright dot distract from the whole image.

How to test your screen and sensor for dead or hot pixels
Before blaming your camera for every dead pixel photo, you need a repeatable test that separates sensor issues from display defects. Start by cleaning the lens and running a careful pixel test on a neutral subject, because dust on the glass can mimic tiny dots or white dots when you shoot at narrow apertures. Then move to a controlled pixel check on both the camera screen and your main monitor so you can separate sensor defects from LCD or OLED display problems and avoid misreading a panel issue as a sensor failure.
Set your camera to its lowest base ISO, choose a mid aperture such as f/5.6–f/8, and photograph an evenly lit white wall or a full screen white sheet of paper, then repeat with a full black frame using the lens cap on. When you review these test screens at 100 percent, any pixel dead on the sensor will appear as a tiny black dot on the white frame, while any pixel hot will appear as a bright dot on the black frame, and both will stay locked in place across multiple images. To avoid confusing sensor defects with LCD or OLED display issues, always repeat the same pixel test on a second monitor, because some bright dots or dead pixels may live on the display hardware rather than inside the camera.
Many photographers also run a dedicated pixel test application or web page on their computer, which cycles full screen red, green, blue, black, and white test screens to reveal pixel defects on monitors. If a bright dot appears only on one monitor during this pixel check but not in the original image file, the problem lies with that display and not with the camera sensor. For more control over focus while you run these tests, learning techniques such as back button focus setup helps you lock sharpness and keep the test frames consistent.
Why dead pixels appear and how they affect beginner photography
Every digital sensor contains millions of pixels, so a few defects are statistically inevitable. Manufacturing tolerances, heat, and long exposures can all turn a healthy pixel into a dead pixel or a hot pixel, especially when you push the camera at high ISO or record video for extended periods. That is why camera makers define acceptable limits for dead pixels and bright dots, and why a single dead pixel photo rarely qualifies as a warranty defect on its own according to typical service guidelines from major brands.
For beginners, the real issue is how these pixel defects influence everyday images and learning. A single pixel dead in the far corner of the frame may never show in small prints, but clusters of dead pixels or bright dots can become obvious when you crop tightly, print large, or view on high resolution monitors with excellent dynamic range. When you start practicing long exposure night photography, hot pixels and white dots can multiply across the sky, which makes it harder to judge exposure and color and can discourage new photographers who do not yet understand the difference between noise and permanent pixel defects.
Heat is a major factor, so shooting video on a compact body or running continuous live view on the rear screen can increase the risk of a hot pixel appearing. Renting higher end bodies through services that offer savings with a Lensrentals promo code lets you compare how different sensors handle dead pixels and hot pixels under the same conditions. That kind of hands on comparison builds confidence, because you see that a rare dead pixel photo is a manageable technical issue rather than a sign that you are doing something wrong or that your camera is uniquely defective.
Practical steps to manage dead pixel photo issues in real shooting
Once you confirm a dead pixel or hot pixel on your sensor, the priority is limiting its impact on real images. Most modern cameras include a pixel mapping or pixel remapping function in the menu, which runs an internal pixel test and tells the processor to ignore or average out any pixel defects it finds. Running this process once or twice a year, or after heavy use in hot conditions, keeps new dead pixels and bright dots from spoiling your work and helps maintain consistent image quality.
When your camera lacks pixel mapping, software becomes your main tool for cleaning a dead pixel photo. Raw processors and editors such as Adobe Lightroom Classic, Capture One, and DxO PhotoLab can automatically detect and correct dead pixels, hot pixels, and white dots by comparing neighboring pixels and replacing the defective dot with interpolated color values. A simple before and after workflow is to enable hot pixel removal or defect correction in the raw panel, export a test image, then zoom to 200 percent on a calibrated monitor and use a healing brush to remove any stubborn clusters of dead pixels or bright dots manually, which is slow but effective for critical prints.
Good shooting habits also reduce how often pixel defects become visible. Avoid leaving the camera in direct sun or a hot car, limit extremely long exposures when possible, and give the sensor time to cool between long video takes to reduce the chance of a new pixel hot spot forming. When you must shoot in demanding conditions, bracket exposures to protect dynamic range, because subtle pixel defects are far less noticeable in a well exposed full image than in a heavily pushed file from a noisy sensor or underexposed frame.
Checking your screens and monitors so you do not misdiagnose defects
Many photographers panic about a dead pixel photo when the real problem sits on the monitor or laptop screen. A single pixel dead on an aging LCD panel can look like a tiny black dot on every full screen image, even though the original files are perfectly clean. To avoid unnecessary sensor repairs, you must test your screens and monitors with the same rigor you apply to the camera and keep a record of any long standing panel issues so you can recognize them quickly.
Start by running a dedicated pixel test on each display you use for editing, including laptops, external monitors, and tablets. Display a series of full screen red, green, blue, white, and black test screens, then scan carefully for white dots, bright dots, or dark dots that stay fixed in place while the background color changes, because these are classic signs of pixel defects in the panel. If a bright dot appears in the same position on every test screen but disappears when you move the image to a different monitor, you have confirmed that the defect belongs to the display and not to the camera sensor or lens.
Keeping a clean screen also matters, because dust and smudges can mimic dead pixels or hot pixels at a glance. Wipe your screens gently with a microfiber cloth and a suitable cleaner before running any pixel check, and repeat the process whenever you see suspicious dots that vanish when you tilt the display. For photographers who edit on multiple monitors, labeling which screen has which pixel defects helps you avoid mistaking a long standing panel issue for a new dead pixel photo from your latest shoot and keeps your editing decisions focused on the real image data.
Beginner friendly workflow to keep images clean and dynamic range intact
Building a simple workflow around dead pixel photo prevention gives beginners peace of mind. The first step is to schedule a regular pixel test for both your camera sensor and every monitor you use, ideally once every few months or after any major trip or project. By logging any new dead pixels, hot pixels, or bright dots you notice, you create a baseline that makes future changes easy to spot and gives you evidence if you ever need to contact service or compare results with manufacturer tolerance guidelines.
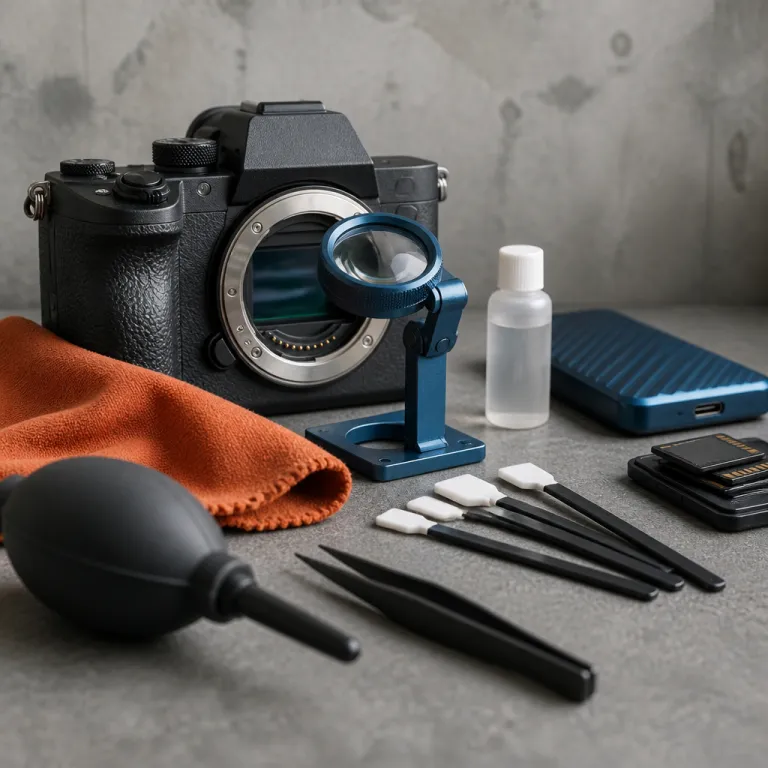
Next, integrate sensor cleaning and dust control into your routine, because dust on the sensor or lens often gets mistaken for pixel defects. Use a blower to remove loose dust, then shoot a full screen test of the sky or a white wall at a narrow aperture to separate dust spots, which move with aperture and focus, from fixed pixel defects, which stay sharp and unchanged. When you edit, always review critical work at 100 percent on a calibrated monitor with good dynamic range, because this reveals both subtle pixel issues and exposure problems before you share or print the image and helps you judge color accurately.
Finally, choose gear and settings that support clean files from the start. Cameras with larger sensors and better heat management tend to show fewer hot pixels in long exposures, while shooting at moderate ISO values reduces the visibility of any existing pixel defects. If you are exploring advanced features such as high resolution video or infrared night vision on a modern vlogging camera, consider testing models like the 6K camcorder with touch screen and night vision, then evaluate how each device handles dead pixels, hot pixels, and overall image quality in your real shooting conditions.
Key statistics about sensor defects and image quality
- Modern APS C and full frame sensors often exceed 20 million pixels, which means that even a handful of dead pixels represents far less than 0.0001 percent of the total photosites on the chip according to typical manufacturer specifications and public sensor data sheets.
- Display industry standards such as ISO 13406 historically allowed a small number of bright dots or dark dots per million pixels on LCD panels, which explains why some new monitors can ship with minor pixel defects while still meeting warranty conditions and published tolerance classes from major brands.
- Laboratory tests published by independent reviewers show that long exposures above 30 seconds can increase visible hot pixels significantly, especially on compact bodies with limited heat dissipation compared with larger cameras that include more robust cooling and better thermal design.
- Sensor cleaning guides from major camera brands report that dust spots are several times more common than true dead pixels, which is why a careful dust removal routine often solves what beginners initially assume is a dead pixel photo problem or a permanent sensor defect.
- Color managed editing on a calibrated monitor with at least 99 percent sRGB coverage helps photographers judge both dynamic range and subtle pixel defects more accurately, reducing the risk of overcorrecting or missing issues before printing and improving consistency across different screens.
FAQ about dead pixel photo issues
How can I tell if a dot is a dead pixel or just dust ?
Shoot a white wall at different apertures and then a black frame with the lens cap on, and compare the results at 100 percent on a clean screen. Dust spots change size and softness with aperture, while a dead pixel or hot pixel stays sharp and identical in every frame. If the dot appears only on one monitor and not on another screen, it is likely a display defect instead of a sensor problem, so repeat the pixel test on multiple monitors before assuming the camera is at fault.
Is a single dead pixel photo enough to return my camera ?
Most manufacturers allow a small number of dead pixels or hot pixels within their specifications, so a single defect usually does not qualify for replacement. Check your warranty policy and run a thorough pixel test to document how many pixel defects you see and whether they grow over time. If clusters of dead pixels appear or the issue worsens quickly, contact service with your test images as evidence and reference the manufacturer’s published tolerance for dead pixels.
Can software completely fix dead pixels in my images ?
Editing software can hide most dead pixels and bright dots by replacing them with interpolated color from surrounding pixels. Automatic hot pixel removal tools work well for isolated defects, especially in raw files, but large clusters or complex patterns may still need manual retouching. For critical work, combine in camera pixel mapping with careful software cleanup and a final pixel check at 100 percent to minimize the impact on final prints.
Do long exposures always create more hot pixels ?
Long exposures increase sensor temperature, which makes hot pixels more likely to appear, especially at high ISO or in warm environments. However, modern cameras often include long exposure noise reduction that captures a dark frame and subtracts many of these bright dots automatically. If you shoot many long exposures, test your camera in controlled conditions so you understand how quickly hot pixels become visible and how effective the in camera processing is.
Should I worry about dead pixels on my editing monitor ?
A few dead pixels or bright dots on a large monitor rarely affect your ability to edit accurately, as long as you know where they are and do not mistake them for image defects. Run regular pixel tests and keep a simple map of any panel issues so you can mentally ignore those spots while working. If new pixel defects spread or appear in critical viewing areas, it may be time to replace the display with a higher quality LCD or OLED monitor that offers better pixel uniformity.