White balance explained for beginners in plain language
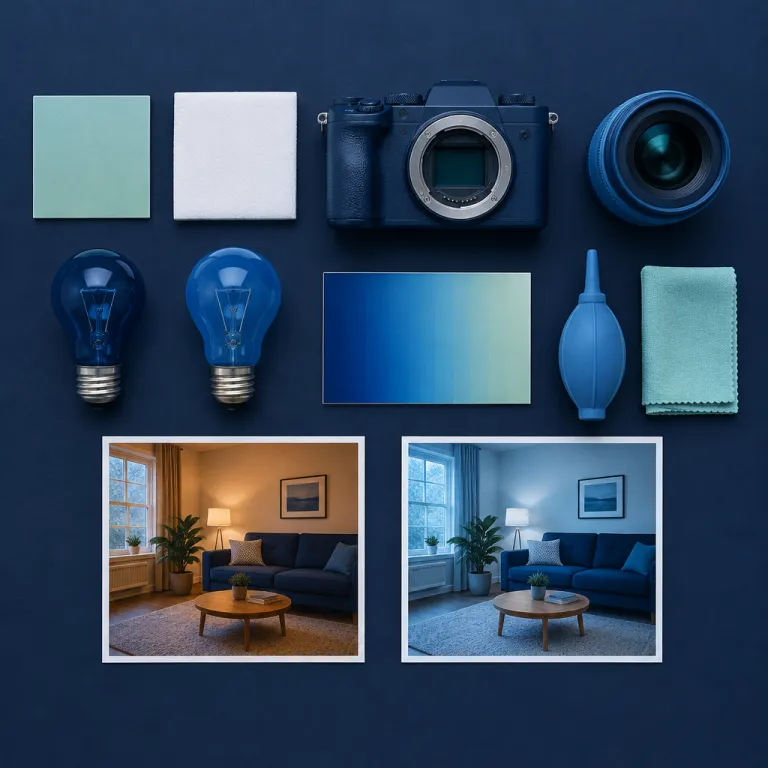
Your living room looks cozy to your eyes, yet the photo turns deep orange. The reason is simple but invisible : your camera is guessing how to balance color from the light in the scene, and indoor bulbs confuse it badly. Once you understand how white balance works, you can control color on purpose instead of letting the camera make random choices.
Every light source has a color temperature, measured in kelvin, which shifts the scene toward warm orange or cool blue. Your eyes auto correct these different color temperatures in real time, but digital cameras need a white balance setting to decide what should look neutral white in the final image. When that decision is wrong, you see ugly color casts that make skin tones look sunburned, sickly, or just wrong.
Think of white balance as the camera’s way to say : “this is neutral white, so everything else will follow”. If the white point is set for natural light at midday, then a tungsten lamp in a living room pushes the photo toward heavy orange colors. When you learn how to adjust white balance and pick better camera settings, your indoor photos suddenly match the scene you remember instead of a bad phone snapshot.
Most beginners leave auto white balance on and hope the camera will fix everything. Auto WB modes are decent outdoors in natural light, but they often fail when mixed light sources hit the same subject from different directions. To get consistent photos, you need to move beyond pure auto and start using white balance presets, custom reference tools, and sometimes manual color temperature control in kelvin values.
How color temperature actually works in real scenes
Color temperature sounds abstract, yet you see it every day without naming it. A candle or tungsten bulb has a low kelvin value, around 2700–3000 K, and throws very warm light, while shade on a blue sky day has a high kelvin value, often 7000–8000 K, and looks cool. Your camera settings try to translate those invisible numbers into a neutral image, but the camera will only succeed if the white balance setting matches the real light sources.
On most digital cameras, you can set white balance using icons like sun, shade, cloudy, tungsten, or fluorescent. These presets tell the camera which color cast to expect, so the processor can adjust whites and pull color back toward neutral. If you shoot a family photo under tungsten bulbs with the shade preset, the image becomes aggressively blue because the white balance logic is correcting in the wrong direction.
Auto white balance looks at the whole scene and assumes the average color should be neutral gray. That works fine when your photo includes a mix of colors, but it fails when a single strong color dominates the frame. A child in a bright red sweater under warm light can trick auto WB into thinking the entire scene is too red, so the camera will over correct and leave skin tones strangely blue.
One practical habit : before you worry about autofocus tricks like back button focus, learn to check the white balance icon every time you move between rooms. Indoors with warm bulbs, try the tungsten or incandescent preset and see how the colors shift toward a more neutral look. When you step back into natural light near a window, switch back to daylight or auto and compare how the same photo changes color temperature instantly.
Simple white balance fixes that work better than auto
When you are starting in photography, you do not need to touch every menu to fix color. Begin with the basic white balance presets on your camera, because they are fast, predictable, and far better than letting auto WB guess in tricky scenes. For most beginners, these presets alone will clean up the worst orange color casts in indoor photos.
Use the tungsten or incandescent preset whenever a room is lit mainly by warm bulbs, typically around 2700–3200 K, and your image will immediately look less orange. Switch to the fluorescent preset under office tubes or cool white LEDs, which often sit around 4000–5000 K and create a green color cast that makes skin look tired. Outdoors in natural light, the daylight, cloudy, and shade presets help you balance color so snow does not turn blue and sunsets do not lose their warmth.
When presets are not enough, many digital cameras offer a custom white balance option. With custom white balance, you photograph something neutral white or mid gray in the same light as your subject, then tell the camera to use that photo as a reference. The white balance system then uses that reference to adjust whites and remove color casts from every later photo in that scene.
If your camera supports manual color temperature control, you can dial in a kelvin number directly instead of relying on icons. Lower kelvin values like 2800 K cool down warm tungsten scenes, while higher values like 6000–7000 K warm up a cool blue shade scene. This kind of manual setting sounds advanced, yet it quickly becomes intuitive, much like choosing the right Fujifilm film simulations for different colors once you have experimented a bit.
RAW files, post processing, and creative color choices
Shooting RAW instead of JPEG is the biggest safety net for beginners learning white balance. A RAW photo keeps all the original color data from the sensor, so you can adjust white balance later in editing software without damaging the image. When you miss the correct setting in camera, a RAW file lets you fix color temperature and remove color casts with almost no quality loss.
In a RAW workflow, you open the photo in editing software, then slide the color temperature and tint controls until whites look neutral. This lets you correct a blue snow scene, a green office, or an orange living room long after the moment has passed. Because the RAW file stores color temperatures as metadata, you can copy one good white balance setting to a whole batch of photos from the same scene.
JPEG files bake the white balance into the image, which limits how far you can adjust color later. You can still use post processing to nudge white balance and reduce a mild color cast, but heavy corrections will damage colors and add noise. For anyone serious about learning photography, switching the camera settings to RAW or RAW plus JPEG is a small step that pays off every time the camera guesses wrong indoors.
Once you are comfortable making a neutral white image, you can start bending color on purpose. Warm up a sunset by choosing a higher kelvin value, or cool a rainy street scene by lowering the color temperature until the blue tones feel moody. This is where white balance stops being a technical chore and becomes a creative tool, just like shaping natural light with a single window and lamp as explained in many one light tutorials.
Dealing with mixed light and building a quick color routine
Mixed light is where even experienced photographers struggle, and where auto white balance usually fails hardest. A living room with warm lamps, daylight from a window, and a television screen creates three different color temperatures on the same face. No single setting can make every part of that scene perfectly neutral, so you need a strategy instead of blind trust that the camera will fix it.
The first rule is to pick a dominant light source and expose for that, then let the rest fall where it may. If the main light on your subject is natural light from a window, set white balance for daylight and accept that the background lamps will look extra warm. If the main light is a tungsten lamp, use the tungsten preset and let the window go blue, which often looks better than a muddy compromise color cast everywhere.
When you add flash, you can sometimes kill the ambient light and simplify the problem. A strong flash balanced for daylight can overpower warm bulbs, so the scene behaves like a single color temperature that is easy to correct. In those cases, your presets or manual kelvin setting become more predictable, because the flash becomes the main light source instead of the messy room lighting.
Build a quick routine : each time you enter a new scene, glance at the light sources, pick the closest preset, and shoot a test photo of something neutral white. Zoom in on that test photo and check whether whites look truly neutral or slightly blue or orange, then adjust white balance one step at a time. A simple three step checklist is : choose the nearest preset, take a test shot of a white or gray object, then fine tune with kelvin or tint if needed. This thirty second habit saves you from hours of post processing later and makes learning white balance feel like a simple checklist rather than a mystery.
FAQ
Why do my indoor photos always look too orange or yellow ?
Most indoor bulbs have a low color temperature, which means their light is very warm compared with natural light. Auto white balance often assumes the scene should be more neutral, so it does not fully correct that warmth and leaves a strong orange color cast. Switching to a tungsten or incandescent preset, or manually lowering the kelvin value to around 2800–3200 K, tells the camera to cool the image down toward neutral white.
Should beginners leave white balance on auto all the time ?
Auto white balance is fine outdoors and in simple lighting, but it is unreliable in mixed light or under strong single color sources. For new photographers, a better approach is to start with auto WB, then switch to presets whenever colors look wrong. Over time, using presets and custom white balance becomes as quick as leaving everything on auto, while giving you far more consistent photos.
Is it worth shooting RAW just for white balance control ?
Shooting RAW gives you much more flexibility to adjust white balance in post processing without damaging the image. If you only shoot JPEG, heavy white balance corrections can add noise and distort colors, especially in low light scenes. For anyone learning photography, using RAW or RAW plus JPEG is one of the easiest ways to protect your photos from bad in camera white balance settings.
How do I set a custom white balance on my camera ?
Most digital cameras let you photograph a neutral white or gray object in the same light as your subject, then choose that frame as a custom white reference in the menu. Once selected, the camera will use that reference to remove color casts from later photos taken in that scene. On many Canon bodies you go to Shoot a custom WB frame > Custom WB, on Nikon to Preset manual, and on Sony to Custom Setup, but the basic idea is always to show the camera what neutral white should look like under the current light sources.
Can I use white balance creatively instead of always aiming for neutral color ?
Yes, once you understand how to get a neutral image, you can deliberately shift color temperature for mood. Warming a sunset by raising the kelvin value or cooling a rainy street by lowering it are simple ways to change the emotional feel of a photo. The key is to start from a clean, neutral white balance, then move the controls slowly until the scene matches the feeling you want rather than strict technical accuracy.