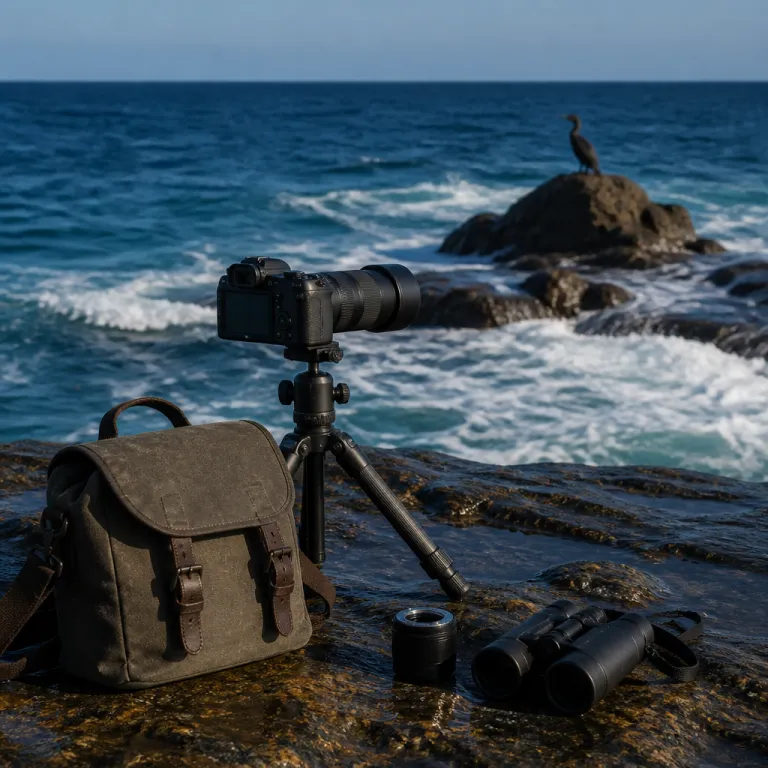
How far 400 mm really gets you for wildlife photography
For most people chasing the best wildlife photography lens on a budget, 400 mm is the magic number. On an APS-C camera such as a Sony α6400 or a Nikon Z 50, a 400 mm lens behaves like a 600 mm focal length in terms of angle of view, which is enough for frame-filling shots of herons, foxes, or deer at a respectful distance. That crop-sensor reach advantage means you can buy a more affordable telephoto lens and still get tight compositions that feel great for serious wildlife photography.
On Micro Four Thirds cameras from Panasonic or Olympus, a 200 mm telephoto lens already gives you a 400 mm equivalent field of view, so a compact 100–300 mm zoom becomes a powerful tool for wildlife work. As of early 2024, lenses such as the Panasonic 100–300 mm f/4–5.6 typically sell between 450 and 600 euros in Europe, which is a fraction of the cost of full-frame super-telephoto glass. This is why many travelers on a limited budget pair a small Panasonic body with a lightweight telephoto zoom instead of chasing huge full-frame wildlife lenses that cost several times the price. The key is understanding how sensor size, focal length, and your distance to the subject interact before you even read a single review or look at specifications.
With full-frame cameras from Canon, Nikon, Sony, or Fujifilm, you need a true 400 mm focal length to match that reach, which usually means a larger lens and a higher price. For example, in mid‑2024, mainstream 100–400 mm zooms from major brands often sit around 1 500–2 500 euros in the EU market, while professional 400 mm f/2.8 primes can exceed 12 000 euros. However, if you mainly photograph larger wildlife such as deer, seals, or zoo animals, a 300 mm telephoto lens can still work when you move carefully and use fieldcraft. Matching your expectations to your camera and lens combination is the first step toward choosing the best wildlife photography lens for your budget without overspending on a maximum aperture you do not actually need.
Budget friendly telephoto zooms for Canon, Nikon, and Fujifilm
Canon shooters looking for the best wildlife photography lens budget often start with the EF 70–300 mm or the EF 70–300 mm IS II, which adapt well to Canon mirrorless cameras via the EF to RF mount adapter. On an APS-C Canon camera body with a 1.6x crop factor, that 300 mm focal length behaves like 480 mm, which is enough reach for many wildlife photography situations if you are patient and learn to approach carefully. In 2024, used copies of the EF 70–300 mm IS II commonly sell in the 350–450 euro range on major European marketplaces, making it a realistic first telephoto for hobbyists. If you already own a Canon EF 70–300 mm for portraits or travel, it can double as a wildlife lens option before you invest in longer telephoto lenses.
For Nikon cameras, the AF-P 70–300 mm DX and the FX version offer strong image quality for the price, especially when used on APS-C bodies where the effective zoom range feels longer. Independent lab tests from sites such as DPReview and Optical Limits have measured these lenses as decently sharp in the center at 300 mm, with some softness toward the corners that rarely matters for wildlife subjects near the middle of the frame. These Nikon lenses are not as bright as professional f/2.8 glass, but their maximum aperture is sufficient in daylight, and their vibration reduction helps keep images sharp at slower shutter speeds. Many photographers pair a Nikon D7500 or a Nikon Z 50 with this kind of telephoto zoom to build a capable wildlife photography kit on a tight budget.
Fujifilm users often rely on the XF 70–300 mm or the older XC 50–230 mm, both of which give a long effective focal length thanks to the APS-C crop factor. While these wildlife lens options do not match the build of premium Fujifilm glass, they offer a great balance of price, weight, and image quality for hikers and travelers. In real-world tests, the XF 70–300 mm is sharp enough at 300 mm to allow moderate cropping for small birds while still delivering detailed 20–26 megapixel files. If you also enjoy portraits or street photography, you might keep a small prime such as a 50 mm alongside your telephoto, and a detailed Canon 50 mm lens test can help you understand how a fast prime complements a longer wildlife lens.
Sony, Sigma, and Tamron: smart telephoto choices for E mount
Sony mirrorless cameras have become a favorite for wildlife photography because their autofocus is fast and their bodies are relatively light. For the best wildlife photography lens budget on Sony E mount, many people start with the Sony 70–350 mm G on APS-C, which gives a 105–525 mm equivalent zoom range in a compact telephoto zoom package. As of 2024, this lens usually retails around 800–900 euros in Europe, which is not cheap but still significantly below the cost of Sony’s professional super-telephoto primes. On full frame, the Sony 70–300 mm or the more expensive 100–400 mm G Master offer better reach, but the price climbs quickly.
This is where third-party lenses from Sigma and Tamron change the equation for budget-conscious photographers who still care deeply about image quality. The Sigma Contemporary 150–600 mm in Sony mount gives you serious reach for birds and distant wildlife, with respectable sharpness through most of the zoom range if you stop down slightly from maximum aperture. Field tests and sample galleries from major review sites show that at 500–600 mm, stopping down to f/8 noticeably improves edge contrast and feather detail on small birds. Tamron counters with the 150–500 mm f/5–6.7 Di III VXD, a lens designed specifically for Sony mount mirrorless cameras, which trades a little reach for a lighter body and a fast linear focus motor.
In real use, the Tamron 150–500 mm Di III VXD feels better balanced on smaller Sony cameras such as the α7C or α7 IV, especially for long hikes where every gram matters. The Sigma Contemporary 150–600 mm is heavier but gives more flexibility for small birds at a distance, and its filter thread size and tripod collar make it easier to use with monopods. If you are considering higher-end Sony telephoto lenses, a detailed look at Sony’s 100–400 mm G Master and its autofocus performance for wildlife shooters can help you judge whether the extra price is justified for your style of photography.
Sigma 150 600 vs Tamron 150 500: reach, handling, and real world tradeoffs
When people ask about the best wildlife photography lens budget between 300 and 1 500 euros, the Sigma Contemporary 150–600 mm and the Tamron 150–500 mm Di III VXD are usually at the top of the list. Both lenses are available for multiple mount systems, including Canon EF, Nikon F, and Sony mount, and they adapt well to newer mirrorless cameras with the right lens adapters. The question is not which lens is perfect, but which compromises fit your wildlife photography better.
The Sigma Contemporary 150–600 mm offers the longer focal length, which matters if you photograph small birds or distant wildlife where every extra millimeter counts. Its maximum aperture of f/5–6.3 through the zoom range is typical for telephoto lenses in this price bracket, and the minimum aperture of around f/22 gives enough depth-of-field control for most situations. In independent sharpness tests, the Sigma is usually strongest between 150 and 400 mm, with a gentle drop in resolution toward 600 mm that is still usable for web-sized images and moderate prints. Autofocus is quick on Canon and Nikon DSLR cameras, slightly slower on some mirrorless cameras via adapters, but still usable for birds in flight with good technique.
The Tamron 150–500 mm f/5–6.7 Di III VXD is built natively for Sony mount mirrorless cameras, which means better communication with the camera body and more consistent autofocus tracking. Its zoom range is shorter, but the lens is lighter and more compact, making it easier to carry on long hikes or to handhold for extended periods while waiting for wildlife. In side-by-side comparisons, many reviewers report that the Tamron holds sharpness slightly better at its 500 mm limit than the Sigma does at 600 mm, which helps when you need to crop a little in post. If you value handling and portability over absolute maximum focal length, the Tamron becomes a great choice, especially when you factor in the similar price and strong image quality across most of the frame.
Teleconverters, technique, and getting sharp wildlife images on a budget
Once you have a solid telephoto lens for wildlife photography, it is tempting to add a teleconverter to stretch your focal length even further. A 1.4x teleconverter works best on lenses with a relatively bright maximum aperture, such as f/2.8 or f/4, because you only lose one stop of light and autofocus performance remains acceptable on most cameras. On a budget zoom with a maximum aperture of f/6.3, adding a 1.4x converter pushes you close to f/9, which makes autofocus slower and forces you into higher ISO values that can hurt image quality.
A 2x teleconverter is even more demanding, costing you two stops of light and often degrading sharpness to the point where the extra reach is not worth the tradeoff. For most people chasing the best wildlife photography lens budget, it is smarter to work on technique than to stack converters on a slow telephoto lens. Use a monopod or a sturdy tripod with a gimbal head when possible, keep your shutter speed at 1/1 000 s or faster for birds in flight, and practice panning smoothly as your subject moves across the frame.
Good technique also means understanding your camera’s autofocus modes, whether you shoot with Canon, Nikon, Sony, Fujifilm, or Panasonic bodies. Continuous autofocus with a small dynamic area, combined with back-button focus, usually gives more keepers than letting the camera decide everything in full auto. If you also invest in fast memory cards to clear the buffer quickly during long bursts, a dedicated guide to top digital camera memory cards will help you avoid bottlenecks that can cost you the best moment of wildlife action.
System specific budget paths: Canon RF, Nikon Z, Sony E, and Micro Four Thirds
Canon RF shooters looking for the best wildlife photography lens budget often start with adapted EF lenses, because native RF telephoto lenses are still expensive. A Canon EF 70–300 mm or a Sigma Contemporary 150–600 mm in Canon mount, used with the official EF to RF adapter, gives strong image quality and autofocus that is good enough for most wildlife photography scenarios. As of 2024, this kind of adapted setup can cost 700–1 200 euros in total if you buy lenses on the used market, compared with several thousand euros for Canon’s RF super-telephoto primes. Over time, you can upgrade to native RF telephoto lenses, but there is no rush if your current wildlife setup is delivering the images you want.
Nikon Z shooters follow a similar path, using Nikon lenses in F mount or third-party options via the FTZ adapter until more native Z mount telephoto lenses reach budget-friendly prices. A Nikon 70–300 mm AF-P or a Tamron 100–400 mm in Nikon mount works well on Z bodies for wildlife, especially when you take advantage of the in-body stabilization and good high-ISO performance. Sony E mount users have the widest range of options, from the compact 70–350 mm for APS-C to the Tamron 150–500 mm Di III VXD and the Sigma Contemporary 150–600 mm, all of which cover serious wildlife needs without the price tag of exotic primes.
Micro Four Thirds shooters using Panasonic or Olympus cameras can reach 400 mm equivalent with much smaller lenses, such as a 100–300 mm or a 75–300 mm, which keeps the overall camera and lens package light for travel. These systems often have smaller filter thread sizes, which makes filters cheaper and easier to share across multiple lenses. Whatever system you choose, the real best wildlife photography lens budget is the one that balances focal length, maximum aperture, handling, and price in a way that keeps your camera in your hands rather than in a closet.
Key figures for budget wildlife lenses
- Entry-level telephoto zooms such as 70–300 mm lenses typically cost between 300 and 600 euros in early 2024, which is less than one quarter of the price of many professional 400 mm f/2.8 primes from Canon, Nikon, or Sony.
- Crop factor gives APS-C cameras roughly a 1.5x field-of-view advantage (1.6x on Canon bodies) and Micro Four Thirds cameras a 2x advantage, so a 300 mm lens on APS-C frames like a 450–480 mm lens on full frame, and a 200 mm lens on Micro Four Thirds frames like a 400 mm lens.
- Most budget telephoto lenses have a maximum aperture between f/5 and f/6.7 at the long end, which means you need at least ISO 1 600 in overcast light to maintain a shutter speed of 1/1 000 s for sharp bird images.
- Teleconverters reduce light by one stop for 1.4x models and two stops for 2x models, so pairing a 1.4x converter with an f/4 lens gives you an effective maximum aperture of f/5.6, while a 2x converter turns the same lens into an f/8 optic.
- Typical filter thread sizes for budget telephoto lenses range from 58 mm to 95 mm, and larger diameters can double the price of high-quality circular polarizers or neutral density filters compared with smaller threads.
FAQ about budget wildlife lenses
Is 300 mm enough for wildlife photography on a budget
On APS-C or Micro Four Thirds cameras, a 300 mm lens can be enough for larger wildlife or for birds at feeders, because the crop factor effectively increases your reach. On full-frame cameras, 300 mm often feels short for small birds, so you may need to crop more in post-processing. If you want frame-filling bird images without heavy cropping, aim for at least 400 mm equivalent focal length.
Should I buy a 150 600 mm zoom or a 70 300 mm lens first
If you are new to wildlife photography and working with a tight budget, a 70–300 mm lens is usually the smarter first purchase because it is lighter, cheaper, and more versatile for travel and general photography. A 150–600 mm zoom is better for dedicated wildlife shooters who already know they want maximum reach and are comfortable carrying a heavier lens. Many photographers start with 70–300 mm, learn their limits, and then upgrade to a longer telephoto zoom when they are sure wildlife is their main focus.
Do I need image stabilization in a wildlife lens
Optical stabilization in the lens or in-body stabilization in the camera helps a lot for wildlife photography, especially at focal lengths beyond 300 mm where even small movements blur the image. Stabilization does not freeze subject motion, so you still need fast shutter speeds for birds in flight, but it makes handholding at slower speeds more reliable for perched animals. If you shoot mostly from a tripod with a gimbal head, stabilization is less critical but still useful for flexible shooting.
Are third party lenses from Sigma and Tamron reliable for wildlife
Modern third-party lenses from Sigma and Tamron offer strong image quality, solid autofocus, and good weather resistance for wildlife photography at a lower price than many first-party options. The Sigma Contemporary 150–600 mm and the Tamron 150–500 mm Di III VXD are widely used by enthusiasts who need long reach without paying for exotic primes. As long as you check compatibility with your camera mount and keep firmware updated, these lenses are a dependable part of a best wildlife photography lens budget kit.
How important is maximum aperture for a budget wildlife lens
A brighter maximum aperture such as f/4 or f/2.8 helps in low light and gives smoother background blur, but these lenses are usually very expensive and heavy. For most people on a budget, a telephoto zoom with a variable maximum aperture between f/5 and f/6.7 is a practical compromise that still delivers good results in daylight. You can compensate for a slower aperture by raising ISO, using good technique, and choosing times of day with better light.