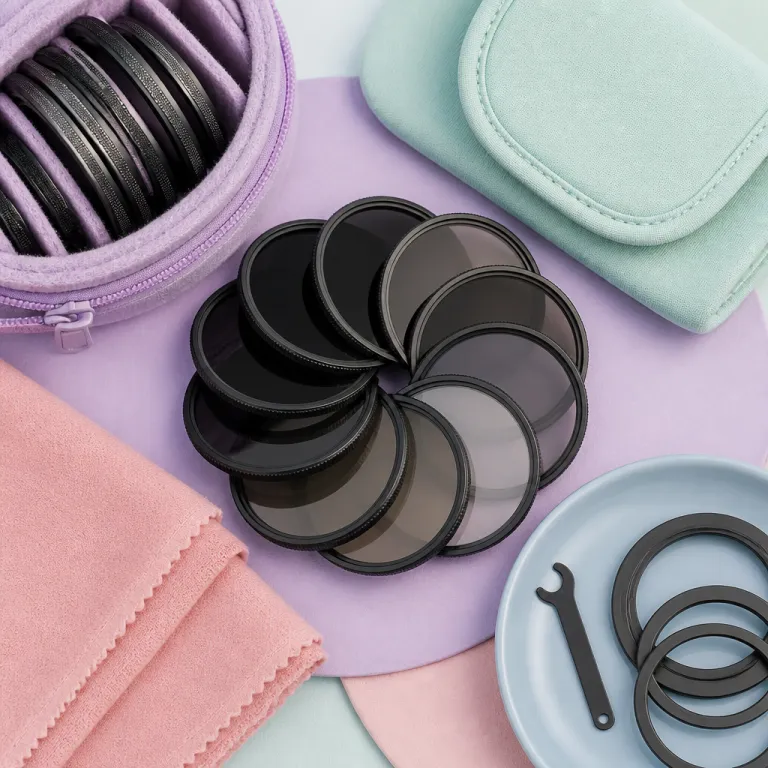

Understanding which ND filter to choose for digital cameras
Many photographers quietly ask themselves which ND filter they truly need for their digital cameras. The real decision starts with how much light reduction you require to control exposure in bright conditions. Once you understand how neutral density filters change exposure time, you can match the right density filter to your creative goals.
A neutral density filter is simply a piece of optical glass that reduces the amount of light entering the lens. Because this neutral glass lowers optical density evenly across the spectrum, it preserves color accuracy while extending exposure times. By adding different density filters to your kit, you gain precise control over shutter speed, aperture, and motion blur in situations where the scene is too bright.
When you ask which ND filter to buy first, think about your usual exposure. In harsh midday sun, a strong neutral density filter with 6 to 10 stops of light reduction enables long exposures of several seconds. In softer light, lighter screw filters with 2 to 4 stops are often the best compromise between flexibility, image quality, and ease of use.
How ND filters interact with shutter speed, aperture, and depth of field
The core of the which ND filter decision lies in the exposure triangle. Every density filter changes the balance between shutter speed, aperture, and ISO, which directly affects motion blur and depth of field. If you want smooth water or creative blur effects in bright conditions, you must slow shutter speeds while keeping exposure under control.
Consider a landscape scene where the base exposure time is 1/125 s at example aperture f/11. Adding a 3 stop neutral density filter turns that into a longer exposure of 1/15 s, which begins to show gentle motion blur in moving water and clouds. A stronger 6 stop density filter in the same light pushes shutter speed to around half a second, creating pronounced blur effects while maintaining the same depth field and overall exposure.
Telephoto work raises a different ND filter question, especially with modern wildlife lenses. When using a lens such as the Canon RF 100–400 mm for action photography, you usually want faster shutter speeds, not long exposures. In that case, a mild neutral density filter or a CPL filter set is enough to fine tune and control exposure without forcing shutter speeds so low that subject motion becomes unmanageable.
Choosing ND filter strength for long exposure and motion blur
To answer which ND filter strength you need, start from your creative intent. If your goal is subtle motion blur in water or traffic, a 3 stop or 4 stop neutral density filter usually provides sufficient light reduction. For dramatic long exposure images with silky water and streaking clouds, stronger density filters in the 6 to 10 stop range are the best tools.
Imagine a coastal scene in bright conditions where your base exposure time is 1/60 s at example aperture f/8. A 6 stop density filter extends that to roughly 1 second, which transforms choppy water into smooth motion while keeping color and contrast neutral. Step up to a 10 stop optical density filter and you can reach exposure times of about 16 seconds, creating ethereal long exposures where moving elements almost vanish.
Wide angle lenses respond beautifully to this kind of longer exposure work, especially in landscape photography. A lens such as the Fujifilm XF 16 mm f/1.4 R WR in real world use pairs perfectly with high quality screw filters for seascapes and cityscapes. With the right neutral density filter set, you can keep your preferred aperture for depth field control while using slow shutter speeds to sculpt motion blur exactly as you imagine it.
ND filters, CPL filters, and color accuracy in bright conditions
Many photographers wondering which ND filter to buy also ask about CPL filters. A circular polarizing filter is not a neutral density filter, but it does create light reduction of roughly 1 to 2 stops while controlling reflections and enhancing color. In bright conditions, combining a CPL with a moderate density filter can be the best way to manage exposure and contrast simultaneously.
Because a CPL filter selectively removes polarized light, it deepens blue skies and cuts glare on water or glass surfaces. This selective light reduction differs from the uniform optical density of neutral density filters, which aim to remain neutral in color and tone. When stacked carefully, both filters allow longer exposure times without sacrificing accurate color or introducing unwanted color casts.
Quality matters when you stack filters, especially for high resolution digital sensors. Cheap glass density filters can soften detail, reduce contrast, and introduce uneven color shifts across the frame. Investing in the best multi coated screw filters you can afford protects image sharpness, maintains consistent exposure across the frame, and keeps your ND filter decision from being limited by optical compromises.
Practical ND filter sets for travel and everyday photography
For many photographers, the real ND filter choice is not a single filter but a compact set. A practical travel kit might include a 3 stop, 6 stop, and 10 stop neutral density filter, all in the same diameter to simplify use. With this small set of density filters, you can handle everything from mild light reduction for portraits to extreme long exposures at the coast.
On a city break, a 3 stop density filter lets you open the aperture for shallow depth field in bright light while keeping shutter speeds within the safe hand held range. The same filter can add just enough motion blur to passing crowds without turning them into complete ghosts. When you reach a river or fountain, swapping to a 6 stop neutral density filter enables longer exposure times that smooth water while preserving architectural detail.
Storage and workflow also influence ND filter decisions for digital cameras. If you shoot many long exposures in RAW, you will quickly fill memory cards with large files. Planning your filter use alongside storage needs and consulting resources such as this guide on how many photos fit on a 128 GB card helps you balance creative ambitions with practical limits.
Technical details behind ND ratings, optical density, and exposure control
Understanding the numbers behind ND ratings clarifies the ND filter question. Manufacturers describe filters using both stops and optical density values, which represent how much light reduction each filter provides. For example, an ND8 filter equals 3 stops of neutral density, while an ND64 filter equals 6 stops, each doubling exposure time with every additional stop.
When you attach a 3 stop density filter, you multiply the base exposure time by eight. A base shutter speed of 1/250 s becomes 1/30 s, and a base exposure of 1/30 s becomes a longer exposure of one quarter of a second. The same logic applies to aperture and ISO, but most photographers prefer to keep example aperture and ISO fixed, then adjust shutter speeds to control exposure and motion blur.
Different brands label density filters using ND numbers, optical density values, or simple stop counts. To avoid confusion when choosing which ND filter to use, remember that each stop halves the amount of light and doubles exposure times. Once you internalize this relationship, you can quickly calculate the longer exposure you need for water, clouds, or traffic, then select the best neutral density filter from your set without guesswork.
| Stops of ND | Multiplier | Example: 1/125 s base shutter |
|---|---|---|
| 3 stops | ×8 | 1/15 s |
| 6 stops | ×64 | 0.5 s |
| 10 stops | ×1024 | 8 s |
In practical shooting, this means that a base exposure of 1/60 s at f/8, ISO 100 becomes 1/8 s with a 3 stop ND filter, 1 second with a 6 stop filter, and around 16 seconds with a 10 stop filter, all at the same aperture and ISO. A simple workflow is to meter the scene without any filter, decide how many stops of light reduction you need for the desired motion blur, then multiply the base shutter speed by the corresponding factor before mounting the neutral density filter on your lens.
Key statistics about ND filters and long exposure photography
- Long exposure landscape photographers frequently rely on 6 stop and 10 stop neutral density filters because they provide enough light reduction for multi second shutter speeds in daylight.
- Independent lens and camera reviews consistently show that high quality multi coated glass screw filters preserve fine detail and contrast more effectively than cheaper density filters.
- Using ND filters for long exposures usually encourages more tripod use, since slower shutter speeds demand better stability and careful technique in the field.
- Practical exposure guides show that moving from a base shutter speed of 1/125 s to a 30 second long exposure requires 11 stops of light reduction, which typically combines a strong neutral density filter with lower ISO and a narrower aperture.
FAQ about which ND filter for digital cameras
Which ND filter strength is best for smoothing water in daylight
For gentle smoothing of water in rivers or fountains, a 3 stop or 4 stop neutral density filter is usually enough. In very bright conditions at the coast, a 6 stop density filter often works better because it allows longer exposure times of one second or more. If you want extremely silky water with strong motion blur, a 10 stop filter is the best choice.
Do I need both an ND filter and a CPL filter
An ND filter and a CPL filter serve different purposes, so many photographers use both. The neutral density filter controls exposure by reducing the amount of light, while the CPL manages reflections and increases color saturation. When stacked carefully, they provide combined light reduction and reflection control, which is valuable for water, glass, and landscape scenes.
Are variable ND filters as good as fixed density filters
Variable ND filters offer flexible light reduction by rotating the front ring, which is convenient for video and fast changing scenes. However, high quality fixed density filters usually provide better optical performance, with more consistent color and fewer artifacts at extreme settings. If image quality is your top priority, a small set of fixed neutral density filters is often the best solution.
How do I avoid color casts when using ND filters
Color casts usually come from lower quality glass or coatings in density filters. Choosing reputable brands with neutral coatings and using fewer stacked filters reduces the risk of unwanted color shifts. Shooting RAW and applying a custom white balance also helps maintain accurate color when you rely on strong neutral density filters for long exposures.
What ND filter should I buy first for general photography
For most photographers asking which ND filter to start with, a 3 stop or 6 stop neutral density filter is the most versatile first purchase. A 3 stop filter handles portraits and moderate motion blur, while a 6 stop filter opens the door to more dramatic long exposure work. Over time, many photographers add a 10 stop density filter to complete a flexible three filter set.