
Why lighting matters more than the latest camera body
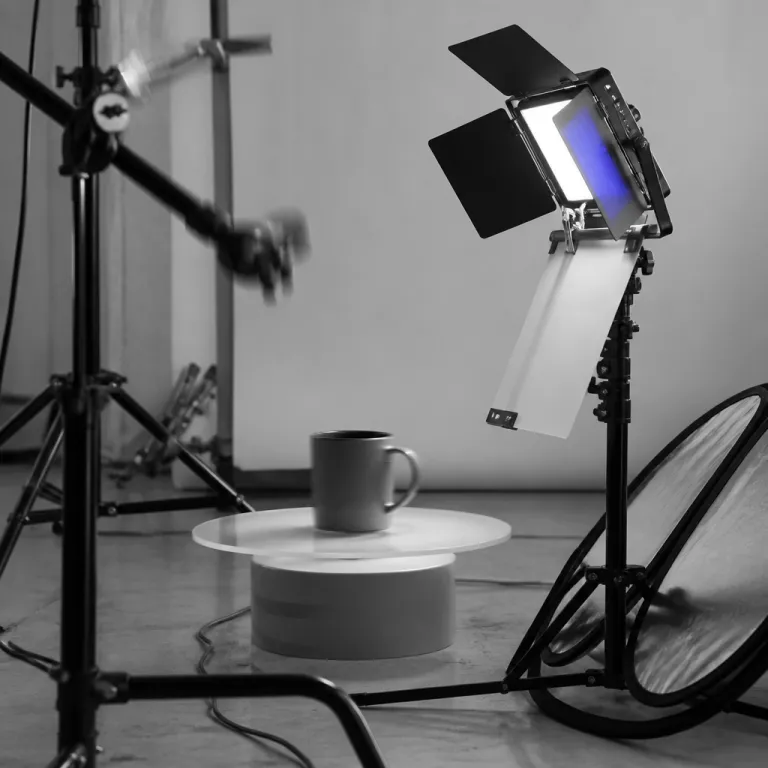
For consistent product photography, lighting equipment shapes the story before the camera does. When you control every light, modifier, and lens choice, you decide how the product will feel, not just how it will look. Thoughtful lighting in a small studio turns ordinary products into high quality product shots that resemble professional advertising campaigns and e commerce listings.
Continuous LED lights and flash units each serve a different type of shooting. LED light panels show you the scene in real time, while flash lighting freezes motion and keeps product photos crisp at low ISO values. A balanced kit often mixes both options so your photography equipment adapts to reflective products, matte surfaces, and fast paced workflows without changing your overall product photography setup.
Even a basic product photography setup needs more than one light source. A single hard light from the side creates dramatic shots, but it can also exaggerate flaws on small items and textured materials. Adding a second LED light or a reflector softens shadows and gives the camera sensor more usable detail across the frame, which reduces retouching time and keeps colours consistent between sessions.
Building a controlled tabletop studio for small items
A compact table top studio is the most efficient way to photograph small items with repeatable results. You can start with a sturdy table, a neutral poster board as a sweep backdrop, and one or two LED lights placed at a 45 degree angle. This simple equipment studio layout already gives your camera and lens a clean environment for consistent product shots and basic catalogue photography.
To refine the look, add a dedicated backdrop system rather than taping paper to the wall. A white fabric or paper background mounted on stands, similar to a basic 8 x 10 ft backdrop kit, helps avoid wrinkles and strange shadows behind products. Curving the poster board or backdrop into a smooth sweep removes the horizon line, which keeps attention on the product instead of the studio and simplifies background cleanup in post production.
For table top product photography, position the camera on a stable camera tripod to keep framing identical between shots. A tripod with a tilting center column lets you shoot straight down, which is ideal for flat lays and very small items. Locking the camera tripod height and angle also speeds up shooting when you need multiple products photographed under the same lighting conditions, especially for online shops that require uniform product images.
Choosing the right lights, modifiers, and kits
The heart of any product photography equipment list is the lighting kit you rely on daily. Entry level photographers often start with continuous studio lights because they behave like household lamps, making it easier to see how light falls on products. As your skills grow, you can add more advanced options such as flash heads, strip softboxes, and focused reflectors for precise control over highlights and shadows on reflective surfaces.
When evaluating a photography lighting kit, pay attention to color temperature and color accuracy. Daylight balanced LED light sources around 5500 K keep product photos neutral, while a high Color Rendering Index above 95 preserves subtle tones in fabrics and cosmetics. Independent tests from manufacturers and review labs frequently report CRI values of 95–98 for mid range LED panels, which is significantly higher than many older fluorescent studio lights that often scored below 85 in similar measurements.
Softboxes, umbrellas, and diffusion panels all change how hard or soft the light appears on a product. Large softboxes placed close to the subject create gentle transitions between highlights and shadows, which is ideal for reflective products like bottles and electronics. Smaller modifiers or bare LED lights give more defined edges and are helpful when you want dramatic product shots with a strong sense of shape, such as stylized cosmetics or tech accessories.
Lenses, focal lengths, and framing for product shots
The camera body matters less than the lens when you want clean, distortion free product photography. A dedicated macro lens in the 60 to 105 millimetre range lets you focus very close while keeping lines straight and details sharp. On a full frame camera, this focal length also gives comfortable working distance so lights and reflectors fit easily around the product without casting unwanted shadows.
Zoom lens options can be practical in tight studios, especially when you alternate between wider shots of a table top scene and tight close ups of small items. However, a prime macro lens usually delivers higher sharpness and more consistent rendering across the frame, which helps when clients expect high quality files for large prints. If you are unsure which focal length suits your space, guides that explain portrait lens choices and bokeh decisions also translate well to product framing decisions and background blur control.
Whether you use a mirrorless camera or a DSLR, lock the lens at an aperture that balances depth of field and sharpness. Many macro lenses perform best around f/8 to f/11, which keeps the entire product in focus without excessive diffraction. For lifestyle product photos, you can open the lens slightly wider to separate the subject from the backdrop while still maintaining enough detail for e commerce requirements and marketplace image standards.
Working with smartphones, DIY setups, and real time previews
A modern camera smartphone can be a capable tool for diy product photography when paired with the right lighting. The small sensor benefits from bright continuous lights, because more light allows lower ISO settings and cleaner files. Using a simple tripod mount for the phone stabilizes the camera and keeps framing consistent between shots, which is especially useful for social media product photography.
Real time preview is one of the strongest advantages of smartphone and mirrorless camera workflows. You see how each LED light and reflector affects the product before pressing the shutter, which speeds up experimentation with different lighting options. Many photographers tether their camera to a laptop or tablet so clients can approve product shots in real time while the session continues, reducing the risk of reshoots and missed details.
DIY product photography studios often rely on affordable LED panels, poster board sweeps, and compact light tents. While these tools are basic, careful positioning of lights at roughly a 45 degree angle and small adjustments in height can dramatically improve quality images. As your work grows, you can gradually replace diy product solutions with more robust studio lights and stands without changing the core layout or the way you control reflections.
Stability, angles, and fine control of reflections
Stable support is essential for sharp product photography, especially when you use lower shutter speeds with continuous lighting. A solid tripod with a three way head or geared head lets you fine tune the camera angle by a single degree without losing composition. This precision is crucial when shooting reflective products, where tiny changes in angle move highlights across the surface and can reveal or hide imperfections.
In a controlled photography studio, you can also use small props such as acrylic risers, clamps, and articulated arms to position products exactly. These accessories keep items steady while you adjust studio lights, flags, and reflectors to manage unwanted reflections. For glossy packaging, placing black cards just outside the frame shapes the light and adds definition to edges, which helps the product stand out against a bright backdrop and gives a more premium appearance.
Many professionals build repeatable setups for specific product lines, saving diagrams of light positions, tripod height, and backdrop choices. This habit helps new products resemble previous product photos, which is vital for brand consistency across catalogues and online shops. Over time, your product photography equipment becomes a system rather than a random collection of gear, and every piece of equipment serves a clear purpose in producing high quality, reliable images.
Key figures about product photography and lighting performance
- Industry case studies from major e commerce platforms often report that clear, well lit product photos are linked with noticeably higher conversion rates compared with low resolution or poorly lit images, with some internal tests citing double digit percentage lifts in click through and sales, which underlines why investing in proper lighting equipment directly affects sales performance.
- Independent lab tests of modern LED light panels frequently show Color Rendering Index values above 95 for many mid range models, meaning they reproduce colours more accurately than older fluorescent studio lights that often scored below 85, as documented in manufacturer white papers and third party lighting reviews.
- Market analyses of product photography services describe a strong shift toward continuous LED lighting in professional studios, reflecting a move away from traditional tungsten and fluorescent fixtures due to lower heat output and reduced power consumption, a trend noted in several recent photo industry equipment reports.
- Surveys among commercial photographers commonly note that using a tripod for product shots reduces the need for reshoots, because consistent framing and sharpness simplify client approvals and post production workflows, especially for catalogues with hundreds of similar items.
FAQ about product photography equipment and lighting
What is the most important piece of product photography equipment for beginners ?
For most beginners, reliable lighting is more important than the latest camera body. A pair of daylight balanced LED lights with basic softboxes will improve colour accuracy and sharpness far more than upgrading from one camera generation to the next. Once lighting is consistent, adding a sturdy tripod and a simple backdrop system completes a solid starter kit for small studio product photography.
Do I need a macro lens for small product shots ?
A dedicated macro lens is not mandatory, but it makes close up work easier and sharper. Macro lenses allow you to focus very close while keeping distortion low, which is ideal for jewellery, cosmetics, and other small items. If your budget is tight, a good standard zoom lens can work initially, but plan to add a macro lens as your product photography grows and clients request higher resolution detail shots.
Are smartphones good enough for professional product photos ?
Modern smartphones can produce impressive product photos when paired with strong, controlled lighting and a stable support. They are especially useful for social media content and quick catalogue updates, where speed matters more than extreme resolution. For large print campaigns or demanding retouching, a full frame or APS C camera still offers more flexibility and cleaner files.
Should I use continuous LED lights or flash in my studio ?
Continuous LED lights are easier to learn because you see the effect in real time, which helps when you are new to lighting. Flash systems offer more power and can freeze motion better, but they require more practice to predict the final result. Many photographers combine both, using LED panels for constant preview and flash for final high quality product shots.
How can I avoid harsh reflections on glossy products ?
To control reflections, enlarge and soften the light source by using big softboxes, diffusion panels, or bounced light. Move the lights to the sides at roughly a 45 degree angle and raise them slightly above the product to keep direct reflections out of the camera view. Adding black or white cards just outside the frame lets you sculpt highlights and shadows with fine control, which is especially effective for glass, metal, and polished plastic surfaces.