Understanding the importance of cleaning your astro camera
Why a Clean Sensor Matters in Astronomy Imaging
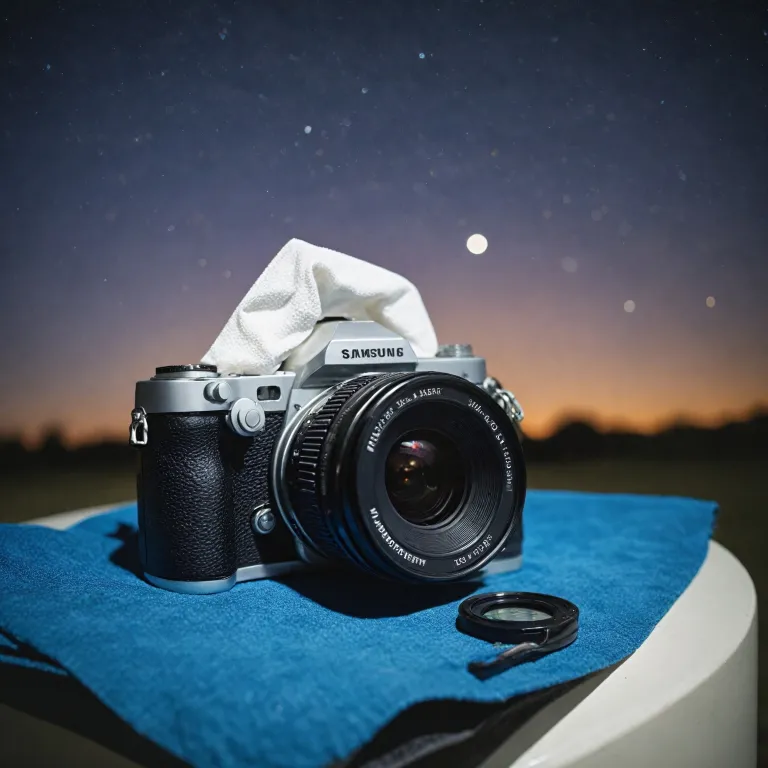
When you’re passionate about astronomy, capturing sharp, clear images is a top priority. The sensor inside your astro camera is the heart of your imaging setup. Even the best cameras, like the ZWO ASI series, can’t deliver top results if the sensor is covered in dust or dry stains. A dirty sensor can introduce unwanted spots, reduce contrast, and make post-processing much harder. That’s why regular cleaning is essential for anyone serious about astrophotography.
How Dust and Stains Affect Your Images
Sensor dust and stains sensor surfaces can create visible marks on your images, especially when shooting at smaller apertures. These marks are often hard to remove in editing, and can ruin an otherwise perfect shot. Dust can also settle on the optics or the board inside your camera, further degrading image quality. Using the right cleaning solution and cleaning kit helps prevent these issues and keeps your camera sensor in optimal condition.
Protecting Your Investment
Astro cameras are a significant investment. Proper cleaning and maintenance not only preserve image quality but also extend the lifespan of your equipment. Using the best cleaning optical methods and products, like a bulb blower or specialized cleaning fluid, helps avoid damage. It’s important to follow a reliable guide and avoid shortcuts that could harm your sensor or optics.
Building Good Cleaning Habits
Getting started with sensor cleaning can feel intimidating, but with the right approach, it becomes a routine part of your astronomy workflow. Many posts on the homepage astrofriend community offer practical advice and tips for cleaning camera sensors safely. Over time, you’ll learn how to spot when your camera needs attention, what tools work best, and how to avoid common mistakes that can lead to costly repairs.
- Regular cleaning prevents dust dry spots and stains sensor issues
- Using a proper cleaning solution and cleaning kit is essential
- Following a step-by-step guide ensures safe and effective cleaning
- Maintaining your camera after cleaning helps keep your images sharp
Remember, a clean sensor is the foundation for capturing the best possible astronomy images. Don’t let dust or stains hold back your creativity—make cleaning a regular part of your imaging routine.
Identifying the right time to clean your astro camera
Recognizing When Your Camera Needs Cleaning
Knowing the right moment to clean your astro camera is essential for maintaining image quality and protecting your equipment. Dust, dry stains, and smudges can quickly accumulate on the camera sensor and optics, especially during frequent astronomy sessions. If you notice unexpected spots, streaks, or reduced sharpness in your images, these are clear signs that your sensor or optics might need attention.
- Visible dust or particles on your sensor or lens can show up as dark spots in your astro images.
- Dry stains or smudges may appear after using improper cleaning fluid or touching the optics accidentally.
- Frequent lens changes or working in dusty environments increases the risk of sensor dust and debris.
- Performance drops like loss of contrast or strange artifacts in your photos often point to the need for cleaning.
Before you get started with any cleaning solution or kit, it’s important to assess the level of contamination. Sometimes, a gentle blow dust with a bulb blower is enough to remove loose particles. For more stubborn stains sensor or marks, a dedicated cleaning kit with the right cleaning fluid is recommended. Avoid over-cleaning, as unnecessary handling can introduce new issues.
For those interested in broader camera care, including lens selection for specific photography needs, you might find this guide on choosing the ideal lens helpful. It offers insights that can benefit your overall camera maintenance routine.
Remember, regular inspection and gentle cleaning will help you get the best results from your astro camera. The next posts will cover the essential tools and step-by-step methods to safely clean your camera sensor and optics, ensuring you avoid common mistakes and keep your equipment in top condition.
Essential tools and materials for safe cleaning
Choosing the Right Tools for Safe Sensor Cleaning
Before you get started with cleaning your astro camera, it’s essential to gather the proper tools and materials. Using the right equipment will help you avoid damaging your camera sensor or optics, and ensure you remove dust, dry stains, and other contaminants effectively. Here’s a guide to what you’ll need for a safe and thorough cleaning process.
- Bulb blower: A bulb blower is a must-have for gently blowing dust off the sensor and camera board. Avoid using compressed air cans, as they can introduce moisture or propellant residue.
- Sensor cleaning swabs: Choose swabs specifically designed for your camera sensor size. These are ideal for removing stubborn dust and dry stains without scratching the surface.
- Cleaning solution or fluid: Use a reputable sensor cleaning solution or optical wonder fluid. Never use household cleaners, as they can damage the sensor coating. Apply only a small amount to the swab as directed by the cleaning kit instructions.
- Microfiber cloths: For cleaning optical surfaces like filters or lenses, a lint-free microfiber cloth is best. Make sure it’s clean and free of debris before use.
- Sensor loupe or magnifier: This tool helps you inspect the sensor for dust or stains before and after cleaning. It’s especially helpful for identifying stubborn spots that may affect your astronomy images.
- Gloves and workspace: Wearing powder-free gloves can prevent oils from your hands transferring to the camera. Set up a clean, dust-free workspace to minimize the risk of introducing new contaminants.
Many cleaning kits on the market are designed specifically for astro cameras, such as the ZWO ASI series. These kits often include swabs, cleaning fluid, and a bulb blower, making them a convenient choice for beginners and experienced users alike. If you’re unsure which kit is best for your camera, check the manufacturer’s recommendations or consult guides from trusted astronomy and camera review sites.
For those interested in maintaining the highest image quality, having a dedicated cleaning kit on hand is a smart investment. It’s also worth exploring resources like the benefits of renting a photo scanner for digitizing your astronomy images, which can further enhance your workflow.
Remember, using the right tools and materials is the foundation for safe and effective sensor cleaning. This will help you avoid common mistakes and keep your astro camera performing at its best for every session.
Step-by-step guide to cleaning the sensor and optics
Preparing Your Workspace and Camera
- Start by choosing a clean, dust-free environment. Avoid areas with airflow or open windows, as airborne particles can settle on your camera sensor during cleaning.
- Gather your cleaning kit: a bulb blower, sensor cleaning swabs, cleaning fluid (like Optical Wonder or a dedicated sensor cleaning solution), lint-free cloths, and a soft brush. Make sure all tools are specifically designed for camera sensor cleaning to prevent scratches or residue.
- Power off your camera and, if possible, remove the battery. For astro cameras like ZWO ASI, disconnect all cables and accessories. Place the camera on a stable, clean surface or a dedicated cleaning board.
Removing Loose Dust and Debris
- Use a bulb blower to gently blow dust off the camera sensor and surrounding area. Hold the camera sensor facing downward so gravity helps remove particles. Don’t use compressed air cans, as they can introduce moisture or propellant residue.
- If stubborn dust remains, a soft, anti-static brush can help. Lightly sweep the sensor surface, but avoid touching the sensor with your fingers or any unapproved tools.
Wet Cleaning for Stubborn Stains
- If you notice dry stains or smudges that the blower and brush can’t remove, it’s time for a wet clean. Apply a few drops of cleaning fluid to a sensor swab (never directly onto the sensor).
- Gently swipe the swab across the sensor in one smooth motion, then use the other side for a second pass. Discard the swab after one use to avoid reintroducing dust or solution residue.
- Inspect the sensor under a bright light. If stains persist, repeat with a fresh swab and cleaning solution. Don’t overdo it—excessive cleaning can risk damage.
Cleaning the Optics and Exterior
- For the camera’s optical window or lens, use a separate lint-free cloth and a small amount of optical cleaning solution. Wipe gently in a circular motion, starting from the center outward.
- Clean the camera body and board with a dry microfiber cloth. Avoid letting cleaning fluid seep into seams or electronic components.
Final Checks Before Use
- After cleaning, reassemble your camera and inspect for any remaining dust or streaks. Take a test image of a bright, uniform surface (like the sky or a white wall) to check for sensor dust or stains.
- If you notice persistent marks, repeat the cleaning process with fresh tools. Don’t rush—patience leads to the best results and protects your camera investment.
For more cleaning tips and astronomy camera guides, check the homepage astrofriend and related posts. Remember, using the right cleaning kit and technique will help maintain top image quality and extend your camera’s lifespan. All rights reserved.
Common mistakes to avoid when cleaning your astro camera
Frequent Pitfalls When Cleaning Your Astro Camera
- Using the wrong cleaning solution or fluid – Not every cleaning solution is safe for your camera sensor or optics. Always use a cleaning fluid specifically designed for camera sensors, like Optical Wonder or those included in a reputable cleaning kit. Household cleaners or generic fluids can leave stains or damage coatings.
- Skipping the initial dust removal – Before touching the sensor or optics, use a bulb blower to blow dust away. Rubbing dust particles with a swab or cloth can scratch sensitive surfaces. Sensor dust is best removed gently before any wet cleaning.
- Applying too much pressure – When cleaning the sensor or optics, gentle strokes are key. Pressing too hard with a swab or cloth can damage the sensor board or leave dry stains that are difficult to remove.
- Reusing dirty tools – Always use clean swabs and cloths. Reusing tools can reintroduce dust or spread oils, making the image quality worse. A proper cleaning kit will include enough supplies for several cleanings.
- Ignoring the environment – Cleaning your camera in a dusty or humid room increases the risk of new contaminants. Choose a clean, dry space to get started, and avoid open windows or fans that can blow dust onto your sensor.
- Neglecting to check your work – After cleaning, take a test image of a plain, bright surface to check for remaining dust or stains. If you see spots, repeat the process with fresh tools and solution.
Best Practices to Avoid Damage
- Follow the guide step by step, and never rush the process.
- Don’t use canned air, as it can spray propellant onto the sensor or optics.
- Never touch the sensor or optics with your fingers. Oils from your skin can cause stubborn stains.
- Store your cleaning materials in a dust-free container between uses to keep them ready for the next cleaning session.
Remember, proper cleaning will help your astronomy images stay sharp and clear. If you’re unsure about any step, consult your astrofriend community or manufacturer’s homepage for detailed posts and support. All rights reserved for the information provided in this guide.
Maintaining your astro camera after cleaning
Keeping Your Camera Clean After the First Cleaning
Once you have followed the guide to clean your astro camera sensor and optics, ongoing care is essential to maintain optimal performance. Astronomy cameras, especially models like the ZWO ASI, are sensitive to dust and stains, so regular attention is key. Here are practical steps to keep your camera in top condition:
- Store Properly: Always store your camera in a dust-free, dry environment. Use a sealed case or bag to prevent dust and moisture from settling on the sensor or optics.
- Use Lens Caps and Covers: When not in use, keep lens caps and sensor covers on. This simple habit will help avoid accidental dust or fluid exposure.
- Inspect Before Each Session: Before starting your astronomy imaging, check the sensor and optics for dust or dry stains. A quick inspection can save you from unwanted spots in your images.
- Blow Dust Regularly: Use a bulb blower to gently remove loose dust from the sensor and optical surfaces. Avoid touching the sensor unless necessary, as frequent contact increases the risk of scratches.
- Handle Cleaning Tools With Care: Keep your cleaning kit, including swabs and cleaning fluid, in a clean, dust-free box. Replace any tools that show signs of wear or contamination.
- Choose the Right Cleaning Solution: Only use recommended cleaning solutions like Optical Wonder or those specified for sensor cleaning. Avoid household fluids, as they can leave stains or damage the sensor board.
- Monitor for Sensor Dust: If you notice new dust spots or stains on your images, repeat the cleaning process as described in the guide. Don’t wait too long, as dust can become harder to remove if left for extended periods.
Building Good Habits for Long-Term Performance
Maintaining your astro camera is not just about cleaning—it’s about building habits that protect your investment. Regularly check your camera sensor and optics, use the best cleaning practices, and consult your astrofriend community or homepage astrofriend posts for updates and tips. By staying proactive, you’ll ensure your images remain clear and your camera stays in the best possible condition for every astronomy session.
All rights reserved.