

Understanding xlr and 3.5mm connections
Key Differences Between XLR and 3.5mm Connections
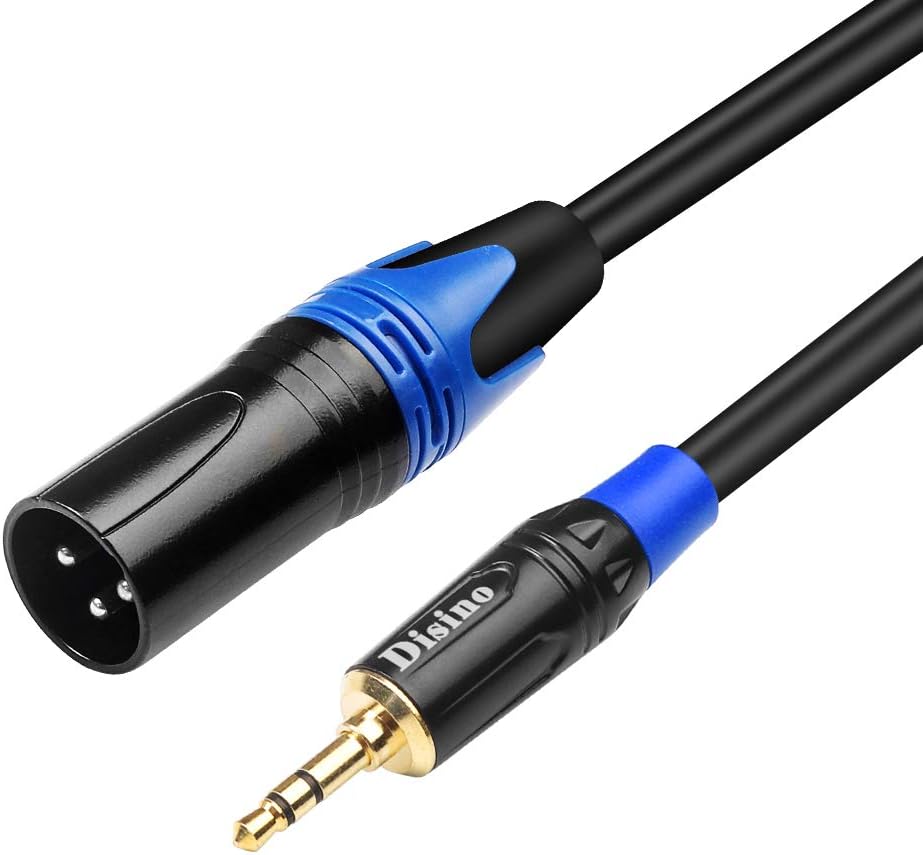
When connecting a microphone to your digital camera, understanding the difference between XLR and 3.5mm connections is essential. XLR connectors are the professional standard for audio equipment, commonly found on microphones, mixers, and audio interfaces. The XLR cable typically has three pins (male xlr and xlr female ends), which carry balanced audio signals. This design helps reduce noise and interference, especially over long cable runs, making it ideal for high-quality audio recording.
On the other hand, the 3.5mm input—sometimes called a mini jack or TRS (Tip-Ring-Sleeve) connector—is the standard audio input on most consumer digital cameras, smartphones, and portable recorders. This input is usually unbalanced, which can make it more susceptible to noise, especially with longer cords or in environments with lots of electronic interference.
Physical Characteristics and Compatibility
- XLR: Circular connector, three pins (xlr pin), robust build, often used with professional microphone cable and audio cable. Available in various lengths (feet), and can be found as straight or angle versions.
- 3.5mm: Small cylindrical plug, usually with two or three segments (TRS male or TRRS), common on consumer devices. The jack is less durable than XLR and not designed for repeated plugging and unplugging.
Adapters and converters are available to bridge the gap between these two standards. For example, a cable adapter with an xlr female to 3.5mm trs male can allow you to use a professional xlr microphone with a camera that only has a 3.5mm input. However, not all adapters are created equal—choosing the right product is crucial for maintaining audio quality and compatibility.
Balanced vs. Unbalanced Audio
One of the main advantages of XLR connections is their ability to carry balanced audio signals. Balanced audio uses three conductors (positive, negative, and ground) to minimize noise and interference. This is especially important for longer cable runs or in environments with lots of electronic equipment. In contrast, most 3.5mm inputs are unbalanced, which can lead to signal degradation over distance.
Understanding these differences is the first step in setting up your audio system. If you want to dive deeper into how specialized equipment like macro microphones can enhance your digital photography, check out this guide on exploring the features of macro microphones for digital photography.
Why use an xlr microphone with a digital camera
Professional Audio Quality for Video Production
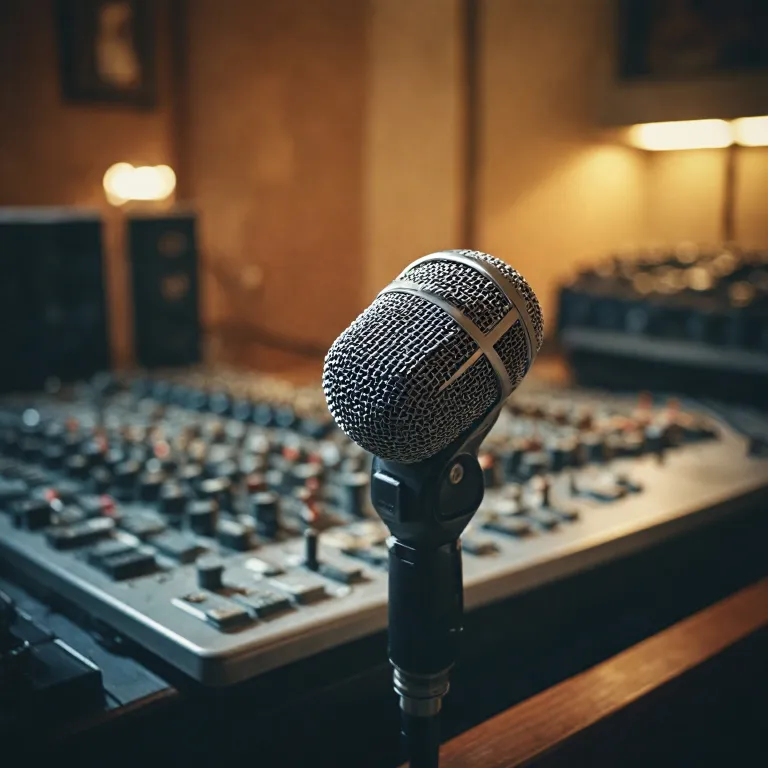
Many digital camera users want to upgrade their audio quality, especially for interviews, vlogs, or event coverage. XLR microphones are the standard in professional audio because they deliver balanced audio, which helps reduce unwanted noise and interference. This is crucial when recording in challenging environments or when you need clear, crisp sound to match your video quality.
Why XLR Microphones Stand Out
- Balanced audio: XLR cables use three pins (pin xlr) to carry a balanced signal, minimizing hum and electromagnetic interference. This is a big advantage over unbalanced 3.5mm (trs) connections.
- Durability: XLR connectors, including male xlr and xlr female types, are robust and designed for repeated use. The locking mechanism prevents accidental unplugging, which is common with standard 3.5mm jacks.
- Compatibility: XLR microphones are widely used in the audio industry, making it easier to find compatible products, cables, and adapters. You can choose from various cable lengths (from a few feet to over 25 feet) and connector angles (like angle trs or straight) to fit your setup.
Expanding Creative Options
Using an XLR microphone with your digital camera opens up more possibilities. You can select from a range of microphone types, such as shotgun, lavalier, or handheld, depending on your recording needs. With the right cable adapter or converter, you can connect these professional mics to your camera’s 3.5mm input, even if it was originally designed for a cell phone or consumer mic cable.
Cost and Value Considerations
While the price of XLR microphones and accessories like xlr cable, cable adapter, or xlr to trs male adapters can be higher than basic 3.5mm options, the improvement in audio quality and reliability often justifies the investment. Balanced audio cables and connectors are built to last, reducing the risk of failure during important shoots.
Real-World Applications
Whether you’re capturing dialogue, ambient sound, or music, an XLR microphone setup ensures your audio matches the quality of your visuals. For those interested in advanced lighting and audio setups, you might also want to explore exploring the Godox V100 Sony flash with lithium battery to further enhance your production workflow.
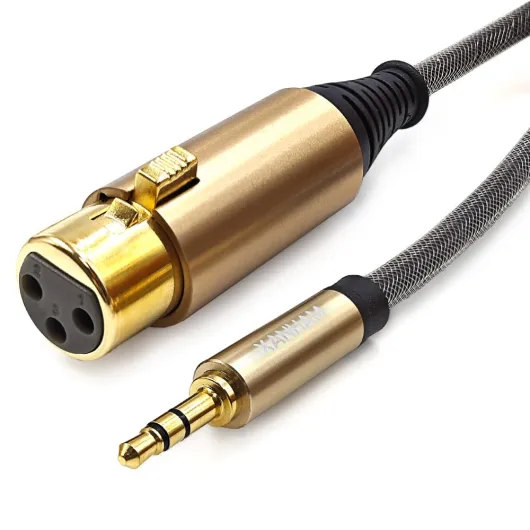
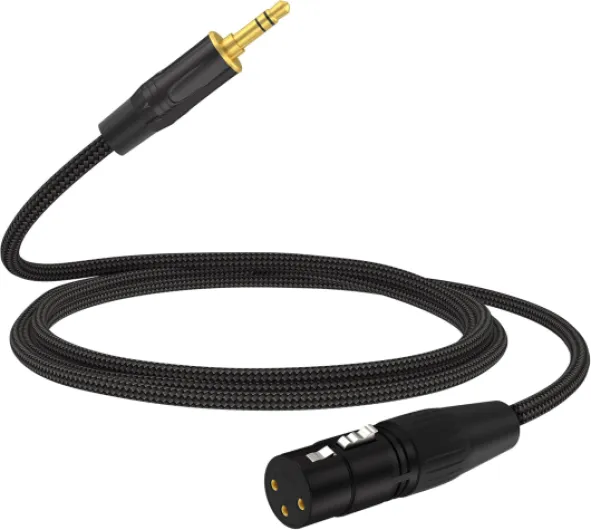
Choosing the right xlr to 3.5mm adapter
Key Factors When Selecting an XLR to 3.5mm Adapter
Choosing the right adapter for connecting an XLR microphone to your camera’s 3.5mm input is crucial for preserving audio quality and ensuring compatibility. The market offers a range of products, but not all adapters are created equal. Here’s what to look for:
- Connector Types: Make sure the adapter has a female XLR (for your microphone cable) and a male 3.5mm TRS jack (for your camera input). Some adapters also come with angle TRS connectors, which can help with tight spaces around your camera’s audio port.
- Balanced vs. Unbalanced Audio: XLR cables are designed for balanced audio, which helps reduce noise over long distances. Most 3.5mm camera inputs are unbalanced. A good adapter will minimize signal loss and interference, but keep in mind that some noise may still occur due to this conversion.
- Pin Configuration: Standard XLR connectors use three pins (pin 1 for ground, pin 2 for hot, pin 3 for cold). The adapter should properly route these pins to the correct contacts on the 3.5mm jack. Mismatched pin assignments can result in weak or distorted audio.
- Build Quality: Look for a robust product with solid connectors and a durable cord. Gold-plated contacts and reinforced cable ends can extend the life of your adapter, especially if you’re frequently plugging and unplugging your microphone cable.
- Length: Adapters come in various lengths, from a few inches to several feet. Choose a length that suits your setup—too short and you’ll be restricted, too long and you risk tangling or signal degradation.
- Price and Value: While it’s tempting to go for the cheapest option, investing in a quality adapter can save you headaches with audio issues down the line. Compare features and reviews before making a purchase.
| Feature | Why It Matters |
|---|---|
| XLR Female to TRS Male | Ensures compatibility with most microphones and camera inputs |
| Balanced Audio Support | Reduces noise and interference |
| Pin Mapping | Prevents audio loss or distortion |
| Build Quality | Improves durability and reliability |
| Length | Offers flexibility in setup |
| Price | Balances cost with performance |
Some adapters also include additional features, like built-in impedance matching or ground lift switches, which can help address specific audio challenges. If you’re planning to use your microphone setup in a vehicle or on the move, consider how to choose the right camera vehicle mount for your needs to ensure your audio gear stays secure and accessible.
Ultimately, the right adapter bridges the gap between professional XLR microphones and the standard 3.5mm input on your digital camera, letting you capture balanced, high-quality audio with minimal hassle.
Potential audio issues and how to avoid them
Common Audio Problems When Using XLR to 3.5mm Adapters
Connecting an XLR microphone to a digital camera’s 3.5mm input can introduce a few audio challenges. Understanding these issues helps you achieve better sound quality and avoid frustration during recording.
- Unbalanced Audio and Noise: XLR cables are designed for balanced audio, which reduces interference and noise over long distances. Most 3.5mm inputs, especially on cameras, are unbalanced. When you use a simple cable adapter or converter, you might lose the noise-cancelling benefits of balanced audio. This can result in unwanted hums or static, especially if your microphone cable or XLR cable runs near power sources.
- Level Mismatch: Professional XLR microphones often output at a higher signal level (mic level or line level) than what a camera’s 3.5mm input expects. This mismatch can cause distortion or very low audio levels. Some adapters include built-in attenuators or preamps to help match the levels, but not all products do.
- Mono vs. Stereo: XLR microphones are usually mono, while many cameras expect a stereo signal on the 3.5mm jack. If you use a basic XLR female to TRS male adapter, your audio might only record on one channel. Some adapters split the mono signal to both left and right channels, so check the product details before buying.
- Phantom Power Issues: Some XLR microphones require phantom power, which most cameras with a 3.5mm input cannot provide. Using a microphone that needs phantom power without an external supply will result in no audio signal.
- Connector Fit and Quality: Not all adapters are built to the same standard. A poorly made cable or adapter can introduce crackling, loose connections, or even damage your camera’s input. Always check the build quality, pin configuration (such as 3-pin XLR male or female), and the angle of the connectors (straight or right angle TRS) for your setup.
How to Prevent and Fix Audio Issues
- Choose the Right Adapter: Use a high-quality XLR to 3.5mm cable adapter that matches your microphone and camera’s requirements. Look for balanced-to-unbalanced converters if needed.
- Check Cable Length: Keep your microphone cable or XLR cable as short as possible (just a few feet) to minimize interference, unless you’re using a balanced audio setup with proper shielding.
- Test Before Recording: Always do a sound check. Listen for hum, buzz, or low volume, and adjust your setup accordingly. Try different cables or adapters if you notice problems.
- Use External Power if Needed: If your XLR microphone needs phantom power, use an external audio interface or preamp that supplies it and outputs the correct level to your camera’s input.
- Secure Connections: Make sure all connectors (XLR male, XLR female, TRS male, etc.) are firmly plugged in. Avoid stress on the cable and use right angle adapters if space is tight.
By understanding these potential audio issues and taking steps to avoid them, you can get the most out of your XLR microphone and camera setup. The right combination of cable, adapter, and attention to detail will help you capture clear, professional sound for your video projects.
Setting up your xlr microphone with your camera
Step-by-step connection process
- Gather your equipment. You’ll need your XLR microphone, an XLR cable (with the correct length in feet for your setup), and a reliable XLR to 3.5mm adapter or converter. Make sure the adapter matches your camera’s input—most digital cameras use a 3.5mm TRS (tip-ring-sleeve) jack for audio.
- Connect the microphone to the XLR cable. Plug the XLR male end of the cable into the XLR female connector on your microphone. Ensure the pins are aligned properly—XLR connectors are designed for a secure, balanced audio connection.
- Attach the XLR cable to the adapter. Connect the XLR female end of your cable to the XLR male side of your adapter. Double-check that the connection is snug and that the pins are not bent or damaged.
- Plug the adapter into your camera. Insert the 3.5mm TRS male plug into your camera’s microphone input. Some adapters come with a right angle (angle TRS) plug, which can help reduce strain on the camera’s port and keep your setup compact.
- Secure your cables. Use cable ties or clips to prevent the mic cable from pulling on the camera or causing unwanted noise. This is especially important if you’re moving around or shooting handheld.
- Set your camera’s audio input. On your camera’s menu, select the external microphone input. Adjust the audio levels to avoid distortion or clipping. If your camera allows, monitor the audio through headphones.
Common mistakes to avoid
- Using an unbalanced cable adapter with a balanced XLR microphone can introduce noise. Always choose a balanced audio cable or adapter for best results.
- Some XLR microphones require phantom power, which most cameras with a 3.5mm input do not provide. Check your microphone’s requirements and use a separate power source if needed.
- Not all adapters are created equal. Low price products may compromise audio quality or durability. Look for a reputable brand and check product reviews before purchasing.
Quick reference table: XLR to 3.5mm connection essentials
| Component | Standard/Type | Purpose |
|---|---|---|
| XLR microphone | XLR 3-pin (male/female) | Captures balanced audio |
| XLR cable | Balanced, various feet | Transfers audio signal |
| XLR to 3.5mm adapter | XLR female to TRS male (angle or straight) | Converts balanced XLR to stereo 3.5mm |
| 3.5mm input (camera) | TRS jack | Receives audio signal |
Following these steps and recommendations will help you set up your XLR microphone with your digital camera, ensuring a clean, professional audio signal for your recordings.
Tips for getting the best sound quality
Optimize Your Recording Environment
To get the best sound quality from your xlr microphone setup, start by controlling your environment. Reduce background noise by recording in a quiet space and using soft materials to absorb unwanted echoes. Even the best xlr cable or adapter can’t fix poor room acoustics.
Check Your Cable and Adapter Quality
Always use a high-quality xlr cable and a reliable xlr to 3.5mm adapter. Low-quality cables or adapters can introduce noise or signal loss, especially over longer distances (for example, more than 10 feet). Look for products with sturdy connectors, proper shielding, and a secure fit between the xlr female and trs male ends. Balanced audio cables are preferred for reducing interference.
Match Levels and Settings
Ensure your camera’s audio input is set to the correct level for an external microphone. Many cameras have a mic level adjustment—set it low enough to avoid distortion, but high enough to capture clear sound. If your xlr microphone requires phantom power, make sure your adapter or audio interface provides it, as most cameras with a 3.5mm jack do not supply phantom power directly.
Monitor Your Audio
Use headphones to monitor your audio in real time. This helps you catch issues like hum, buzz, or low volume before you start recording. If your camera doesn’t have a headphone output, consider using an external audio recorder or a camera with this feature.
Secure Connections and Avoid Stress
- Ensure all connections are tight—loose xlr male or female connectors can cause crackling or dropouts.
- Avoid sharp bends in your microphone cable or xlr cable, especially near the connectors. Use right angle trs or xlr adapters if space is tight.
- Keep cables away from power cords to minimize interference.
Choose the Right Cable Length
Use only as much cable as you need. Excess cable can act as an antenna for noise. Standard lengths like 3 feet or 6 feet are often enough for most setups. If you need a longer run, opt for a balanced xlr cable to maintain audio quality.
Test Before You Record
Always do a test recording. Listen back for any issues and make adjustments as needed. This step helps you avoid surprises during important shoots.
By following these tips and using quality products, you’ll maximize the performance of your xlr microphone and achieve professional audio results with your digital camera.