Understanding the Role of a Light Stand Crossbar
The Essential Component for Versatile Lighting
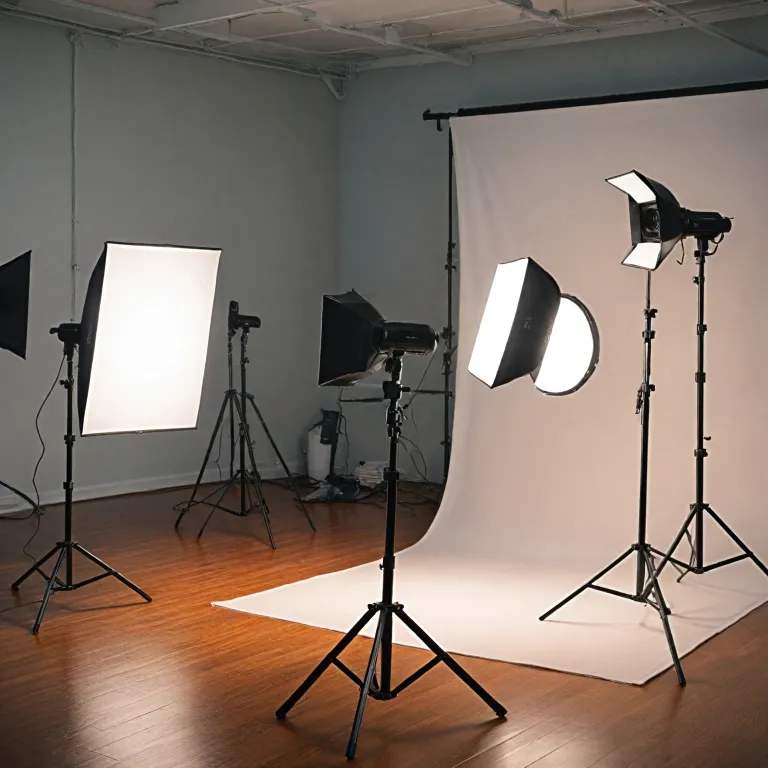
The light stand crossbar stands as an indispensable component for photographers aiming to elevate their studio setup. While lighting stands are often considered for their primary duty of supporting lights, the inclusion of a crossbar can significantly enhance your lighting possibilities. This piece of equipment transforms a basic setup into a versatile system capable of handling various configurations.
Typically made of lightweight aluminum, the crossbar is designed to be easily adjustable and high in load capacity. This flexibility allows photographers to elevate their lighting arrangements to the top tier of studio work, accommodating multiple lights for a more comprehensive view and even distribution of light.
Understanding Its Structure
Modern lighting products incorporate crossbars with height adjustments, usually measured in inches. Most stands come with options for extending them to accommodate different shoot requirements, whether in a compact studio or a larger space. Options vary from heavy duty to lightweight, offering a suitable choice for every photographic need.
Optimizing Your Setup
- Adjustable Height: A core feature is the height adjustable nature of light stand crossbars, enabling photographers to customize according to the required reach, which often is specified in inches.
- Sturdy Support: Heavy duty crossbars offer substantial support for heavy lights, ensuring stability. Look for products indicating a high load capacity, usually in lbs.
The effectiveness of this setup can vary significantly depending on the quality of the crossbar and lighting stands you select. By matching the crossbar with compatible lighting stands, a studio can attain an optimal setup that meets the demands of every creative lighting technique you wish to explore.
Choosing the Right Light Stand Crossbar for Your Needs
Factors to Consider for Optimal Selection
When setting up your photography studio, selecting the right light stand crossbar can significantly influence the quality of your lighting. To ensure you choose a crossbar that suits your needs, consider the following factors:
- Material and Durability: Opt for an aluminum construction, which is both lightweight and sturdy. This helps with portability and ensures the stand can support your lighting equipment effectively.
- Load Capacity: Assess the weight of your lighting equipment and select a crossbar with a suitable load capacity in lbs to prevent sagging or instability.
- Height Adjustability: An adjustable stand allows you to modify the height according to your studio needs. This flexibility is crucial for achieving optimal lighting angles and affects the overall composition.
- Crossbar Length: Consider the inch measurements of the crossbar. A longer crossbar might offer more versatility but may also require more space for setup.
- Portability: If you anticipate needing to frequently move your setup or conduct shoots in various locations, a crossbar that comes with a travel bag ensures convenience and ease of transport.
- Stability and Robustness: Choose a heavy-duty crossbar that can withstand rough handling and remains stable under high tension. Stability is key to preventing accidental tip-overs that could damage your equipment.
Exploring these factors will guide you towards making an informed decision when selecting from the array of lighting stand products available, aligned with your photography project's specific needs.
Setting Up Your Light Stand Crossbar for Optimal Performance
Setting Up for Maximum Efficiency
Setting up your light stand crossbar is a crucial step in ensuring the optimal performance of your photography lighting setup. Whether you're using it in a studio environment or on location, proper assembly and adjustment can make all the difference. When unboxing your lighting crossbar, you'll notice it is often made of a lightweight but sturdy material, such as aluminum. It's crucial to understand the weight and load capacity of your specific product. Typically, light stand crossbars are designed to hold various lighting equipment; knowing your capacity in lbs is essential to prevent any mishaps during a shoot. Firstly, ensure you have a compatible light stand. Most lighting stands are height adjustable, allowing you to tailor the height to your specific requirements. Adjustability is key in achieving the desired lighting angles. A secure and stable tripod base is necessary, especially for heavy duty or high crossbar setups. Once the stand is ready, attach the crossbar securely on top, adjusting it to the required height. It's vital to use a crossbar with a heavy duty support system if you plan on using multiple lights or larger equipment. Make sure to balance the weight distribution evenly to avoid toppling. Consider using an adjustable stand inch by inch to fine-tune your lighting position. Some advanced products come with quick-release levers or knobs for swift adjustments. Utilizing these features can save precious time and give you more creative freedom. To ensure ease of transport and setup, look for a crossbar that comes with a dedicated bag. This not only protects your equipment but also facilitates easier handling when on the go. Lastly, don’t forget to test your setup. Place your light sources and view them in action to check if they meet your visual demands. A well-calibrated crossbar can greatly enhance the cinematographic quality of your photographs. For more creative ideas to expand your photography setup, consider exploring the world through a fisheye lens for innovative perspectives.Creative Lighting Techniques Using a Light Stand Crossbar
Exploring Creative Lighting with Your Crossbar Setup
Once you've set up your light stand crossbar, it's time to dive into the creative possibilities it offers. A versatile crossbar can transform your photography by allowing you to experiment with different lighting techniques. Here's how you can make the most of your setup:
- Overhead Lighting: By adjusting the height of your stand and using the crossbar, you can create stunning overhead lighting effects. This technique is particularly useful in studio settings where you want to highlight the subject from the top, creating dramatic shadows and depth.
- Side Lighting: Position your light source on one side of the crossbar to achieve a side lighting effect. This can add texture and dimension to your photographs, emphasizing the contours of your subject.
- Backlighting: Use the crossbar to support a light source behind your subject. This technique can create a halo effect, adding a sense of mystery and intrigue to your images.
- Multiple Light Sources: If your crossbar supports multiple lights, experiment with different angles and heights. This allows for a more dynamic lighting setup, providing balanced illumination and reducing harsh shadows.
Remember, the key to successful lighting is experimentation. Adjust the height and angle of your lighting stands to see how they affect the mood and tone of your photos. With a sturdy, lightweight aluminum crossbar, you can easily make these adjustments without worrying about the load capacity. Whether you're working with a heavy-duty setup or a more portable option, the right crossbar can support your creative vision.
Troubleshooting Common Issues with Light Stand Crossbars
Troubleshooting: A Step-by-Step Guide
When working with a light stand crossbar, issues may occasionally arise, particularly when dealing with height adjustable features or the weight capacity of your lighting crossbar. Here are some solutions to common problems:- Stability Concerns: If your stand or crossbar feels unstable, check that all adjustable parts are tightly secured. Make sure the load capacity aligns with the product specifications and doesn’t exceed the crossbar's duty threshold, which can lead to instability.
- Setting Up at the Desired Height: Ensure that the stand's height adjustments are locked in place when you've reached the right height. Often, the issue is a simple oversight where the stand inch settings haven’t been properly locked.
- Adjustable Components Not Functioning: Sometimes, adjustable sections can get stuck. If this happens, check for debris or any obstruction within the adjustable mechanisms. A quick clean or gentle lubrication using silicon spray can bring the components back smoothly.
- Crossbar Flexing Under Heavy Loads: If your crossbar is bending, especially if it’s lightweight aluminum, review your load limits as some heavy duty lighting setups may require more robust models. Consider distributing weight more evenly or using a support system to prevent the crossbar from bearing too much weight at one point.
- Inadequate Lighting Coverage: Adjust your setup to achieve optimal lighting. Sometimes, adjusting the height of your stands or the position of your crossbar can change the view and coverage.
Maintaining Your Light Stand Crossbar for Longevity
Prolonging the Life of Your Light Stand Crossbar
To maintain the longevity of your light stand crossbar, it's essential to implement proper care measures. Regular maintenance not only ensures long-lasting use but also enhances the overall functionality and stability during your photography sessions.- Regular Cleaning: Dust and grime can accumulate on your stand crossbar, especially in a studio environment. Use a soft, damp cloth to wipe down both the crossbar and stand components. Ensure that no moisture enters the adjustable mechanisms or any sensitive areas.
- Inspect for Damage: Routinely check for signs of wear or damage on the aluminum parts and the adjustable joints. High load capacities can stress the product over time, leading to potential compromises in stability. If any cracks or unusual bends are noticed, consider replacing the affected parts promptly.
- Secure Handling and Storage: When not in use, disassemble and store your crossbar and stands in a protective bag. This minimizes exposure to environmental elements and prevents accidental knocks. Lightweight storage bags also aid in portability without adding unnecessary weight.
- Tighten Connections: Ensuring that all bolts, screws, and fasteners are tight can prevent unforeseen collapses, especially under heavy-duty conditions. It's prudent to keep a tool kit handy for adjusting these regularly for optimal support.
- Load Capacity Awareness: Adhering to the product's specified load capacity, typically measured in lbs, will prevent overloading and potential damage. Always check the instructions for the recommended load capacity.
- Height Adjustability Care: The adjustable height feature is essential for versatile lighting setups. However, frequent changes in height can lead to wear if not periodically maintained. Lubricate mechanisms as needed to maintain smooth operation.