Understanding Reverse Edge Gradient ND Filters
Exploring the Role of Graduated Neutral Density Filters
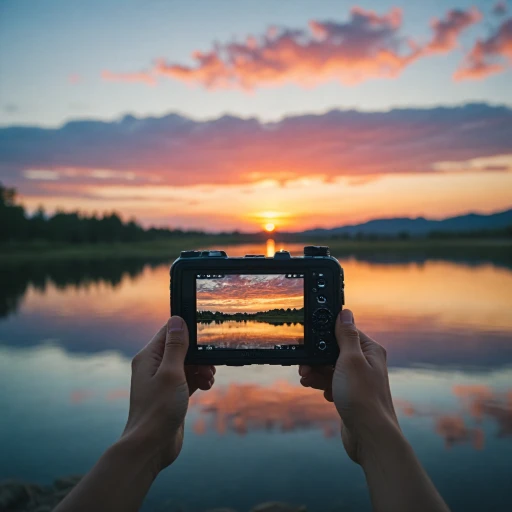
The world of digital photography brings countless tools and accessories to help photographers capture stunning images. One of these invaluable tools is the Graduated Neutral Density (GND) filter, particularly beneficial for sunset photography. GND filters are designed to balance the exposure in scenes with a broad dynamic range, typically where the sky is much brighter than the foreground. They achieve this by having a gradient transition from clear to neutral density, allowing it to darken only part of the image.Reverse Edge for Sunset Magic
Among the various types of GND filters, the reverse edge gradient ND filter stands out as particularly useful for capturing sunsets. Unlike standard GNDs where the transition zone is soft, the reverse GND filter features a density that transitions from a hard gradient at the top to a softer, more neutral effect around the middle section. This unique design makes it perfect for scenes where the sun is just above the horizon, allowing photographers to manage the exposure without making the bright sky overexposed. When diving into the intricacies of sunset photography, understanding the density and transition zones of your GND filter becomes crucial. The reverse edge GND filter will ensure a seamless blend between the bright sky and the softer tones of the landscape below.Understanding GND Variations
Comprehending the density stops and transition types like hard or soft edge can significantly affect your exposure and composition results. Hard transitions are suitable for defined horizons like those found in the Grand Canyon, while softer ones are chosen for more varied scenes without a clear boundary. The choice of GND will depend on various factors, including your camera's focal length, the type of scene, and your shooting goals. For an in-depth understanding of GND filter applications, you might explore how these filters complement wide-angle lenses, which are often employed in landscape photography. This synergy enhances the overall effect of capturing expansive vistas. Navigating the digital landscape with the right filter in your arsenal can be transformative in capturing breathtaking sunsets and translating that vision into a digital masterpiece. Equipped with a comprehensive understanding of GND filters, photographers can elevate their sunset captures to new heights.The Science Behind Sunset Photography
The Science of Capturing Spectacular Sunsets
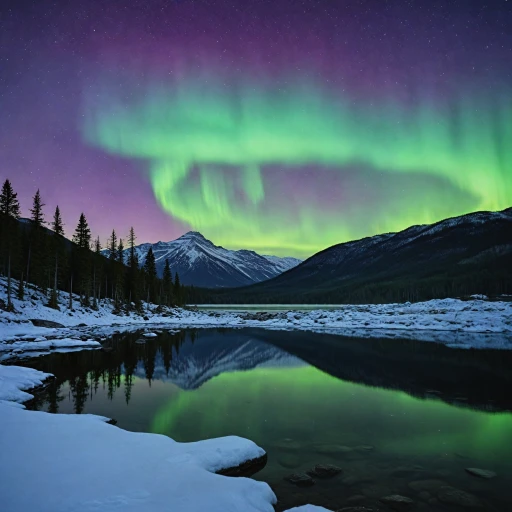
When it comes to sunset photography, the essence of the scene is the dramatic interplay between light and shadow. A crucial understanding of this interplay helps you master the craft of using reverse edge gradient ND filters. Sunsets present photographers with complex lighting conditions due to the pronounced contrast between the bright sky and the darker elements of the landscape. The dynamic range—a measure of the ratio between the brightest and darkest parts of the scene—often exceeds the capability of a digital camera's sensor to fully capture it. This is where ND filters become invaluable, offering a way to balance out extreme exposure differences. The reverse GND filter, with its density concentrated at the center and gradually softening as it moves outward, is particularly effective for sunset photography where the sun is near the horizon. The gentle transition of a soft GND over the front lens allows for smooth blending of exposure between the sky and the foreground. If you're dealing with a particularly hard transition, it's worth considering a range of graduated neutral density filters to manage exposure levels effectively. Options like the Singh Ray or Formatt Hitech provide different grades of density to suit varied lighting conditions, lending a professional quality to your images. When approaching a scene like the Grand Canyon at sunset, the hard edge density of a hard GND filter might emphasize the stark highlights against the rugged landscape, while a soft GND can provide a more subtle transition without washing out the vibrant sky colors. Understanding how exposure levels interact with filters can make the difference between an ordinary photo and one that captures the breathtaking beauty of a sky painted with the brilliant colors of a setting sun. Remember, mastering these techniques can greatly improve your sunset shots, and if you're eager to learn more about enhancing your digital camera skills in extreme lighting conditions, you might find our mastering the art of capturing the aurora borealis with your digital camera guide helpful.Choosing the Right Filter for Your Camera
Finding the Perfect GND Filter for Your Camera
When it comes to capturing the perfect sunset, choosing the right graduated neutral density (GND) filter is crucial. With a variety of options available, understanding the differences between them can significantly impact your photography.
First, consider the density of the filter. GND filters come in different stops of light reduction, typically ranging from 1 to 3 stops. A higher density filter will darken the bright sky more, allowing for a balanced exposure between the sky and the foreground. This is particularly useful when shooting in locations like the Grand Canyon, where the dynamic range can be extreme.
Types of GND Filters
- Soft GND: Ideal for scenes with a gradual transition between the sky and the foreground. The soft edge allows for a smooth transition, making it perfect for landscapes with uneven horizons.
- Hard GND: Best for scenes with a clear horizon line, such as seascapes. The hard transition provides a sharp delineation between the bright sky and the darker foreground.
- Reverse GND: Specifically designed for sunset photography, where the brightest part of the sky is near the horizon. This filter has a hard transition at the center, which gradually softens towards the top.
When selecting a filter, also consider the filter holder system. Brands like Singh Ray and Formatt Hitech offer reliable options that ensure the filter stays securely in place in front of your lens. Additionally, the focal length of your lens will influence the choice of filter size and type.
For those new to sunset photography, exploring low-light conditions with a versatile lens can be beneficial. Check out this guide on low-light photography to enhance your skills further.
Ultimately, the right GND filter will depend on the specific scene and your creative vision. By understanding the nuances of each filter type, you can make informed decisions that elevate your sunset photography.
Techniques for Using Reverse Edge Gradient ND Filters
Implementing the Reverse Edge Gradient ND Filter
To harness the power of the reverse edge gradient ND filter, you first need to familiarize yourself with the characteristics of your filter. These filters excel in managing the bright sky at the horizon during sunset or sunrise, where most of the light is concentrated. Understanding the density of the filter and the transition zone will help you maintain the dynamic range without overexposing or underexposing parts of your scene.
Placement and Adjustment Tips
Properly placing the filter in front of your lens is critical. Use a filter holder for precision, ensuring the filter aligns with the bright spot on the horizon. The reverse GND is designed with a hard transition at the center. This characteristic allows it to gradually soften upwards and downwards, unlike the typical soft GND filters. Adjust the filter so that this hard transition meets the horizon line where the sun is setting, allowing the lower edge to blend into the foreground.
Focal Length Considerations
Your choice of focal length can impact the effectiveness of the GND filters. A wide-angle lens often enhances the transition effect by capturing more of the sky and horizon. However, if you're shooting the sun in a more zoomed-in manner, ensure that the transition line of your filter aligns accurately with the horizon.
Syncing Exposure with Density
The density and stops the filter provides are crucial for controlling exposure. Begin with your baseline exposure settings on your camera without the filter. After, attach the reverse GND filter and adjust the exposure accordingly. This adjustment ensures that both the bright sky and the darker landscape maintain detail, preserving the broad dynamic range of the scene.
Fine Tuning During Post-Processing
Even after using the filter effectively, some post-processing might be necessary to enhance your photography further. Make subtle adjustments to contrast and exposure elements, ensuring the image maintains a natural look. This step helps bring out specific details in the density gradient captured by the filter, creating a polished final photograph.
Common Mistakes and How to Avoid Them
Avoiding Pitfalls for Better Shots
Capturing the perfect sunset scene with graduated neutral density filters can enhance the dynamic range of your digital camera dramatically, but there are some common mistakes to be mindful of to achieve the best results.- Mismatched Filter Density: Not every sunset requires the same neutral density filter. Using a filter with inappropriate stops might either make your sky too bright or too dark. Pay attention to the brightness of the sky and adjust your filter's density accordingly, perhaps experimenting with a reverse GND or hard GND based on the scene.
- Improper Transition Zone Placement: A successful photograph depends on the transition zone of the filter aligning with the horizon of your scene. A hard transition filter is best suited for well-defined horizons like those at the Grand Canyon, while a soft edge filter is more forgiving for scenes with uneven skylines.
- Filter Holder Misalignment: Ensure your filter holder is secure and aligned with the focal length of your lens. Misalignment can lead to poor image quality and unwanted vignetting effects on your photos.
- Ignoring the Lens and Camera Set-Up: A forward-thinking approach involves checking the front lens regularly and setting the right exposure. Be wary of focal length settings and lens specifications to avoid disappointing photos.
- Underestimating Light Conditions: The light and color temperature during sunset change rapidly. Quick adjustments and understanding how GND filters interact with these changing conditions are key to capturing the soft and striking tones effectively.
- Density Filter Overuse: While neutral density filters are great for balancing bright skies and dimming the sun during sunset, don't over-rely on them. A proper balance between natural light and the filter's effect brings out the true beauty of a sunset.
Showcasing Your Sunset Photography
Exhibiting Your Artistic Work: Showcasing the Sunset Masterpiece
Sunset photography is an art form that thrives on capturing the perfect balance between light and shadows. With your newly acquired knowledge of reverse edge gradient ND filters, it's time to display your creations for the world to see. Here are some strategies to help you make the most of your sunset shots and gain the recognition they deserve:- Understand Your Audience: Before selecting the best platform to showcase your work, consider who you want to attract. Whether you cater to serious photography enthusiasts or just share your journey with friends and family, understanding your audience will guide your presentation choices.
- Digital Platforms: Leverage social media platforms like Instagram, which favor visual content and can help promote your work to a broader audience. Make use of relevant hashtags like #SunsetPhotography or #GNDfilter to increase the discoverability of your images.
- Online Photography Communities: Engage with online communities and forums that focus on photography, where you can submit your work for critique. These platforms offer valuable feedback and can help you refine your technique.
- Build a Portfolio: Curating a portfolio of your best work highlights your skills and dedication to capturing vibrant sunsets. Use your understanding of neutral density filters and dynamic range to present a cohesive collection of images that tell a story.
- Attend Exhibits and Contests: Enter your photographs in contests or local gallery exhibitions. This exposure not only builds your credibility as a photographer but also provides networking opportunities with other professionals.
- Education and Workshops: Consider hosting or attending photography workshops to share your expertise on using GND filters for sunset photography. These events position you as an authority and help build a following within the photography community.

