Understanding Wildlife Cameras
A Beginner's Guide to Wildlife Cameras
When it comes to enhancing your backyard with a wildlife camera, the very first step is to understand what makes these unique cameras tick. Wildlife cameras, often referred to as trail cameras, are designed to capture high-quality images and videos of animals in their natural habitat without disturbing them.
These cameras are not just for professionals; even enthusiasts can now easily set them up and start capturing stunning wildlife images. But why choose a wildlife camera over a regular one? The answer lies in their specialized features and functionalities.
One of the core components of wildlife cameras is their ability to record high-definition videos and photos, even at night, thanks to their advanced night vision capabilities. Whether you're using a Bushnell Core, branded for its long battery life, or exploring a Spypoint Force setup for its solar panel compatibility, these cameras are designed to operate for extended periods without much intervention.
Trail cameras often have unique features like motion sensor-triggered capture, ensuring you don't miss that back-yard visitor. The trigger speed is crucial—good trail cameras like the Browning Strike and Bushnell Core models offer quick response times. Look for 'no glow' or 'low glow' settings to maintain stealth without scaring wildlife away.
A wildlife camera's image quality is determined by its resolution and compression settings. Options now include pro-grade cameras that deliver exceptional image results while managing memory card space effectively. For those interested in a cellular trail setup, the option to receive images to your device in real time is a notable convenience.
Next, we delve into the best trail cameras available, exploring their features, specifications, and benefits to help make an informed decision tailored to your needs.Key Features to Look for in a Wildlife Camera
Must-Have Attributes for the Best Trail Camera
When choosing a trail camera for capturing wildlife in your backyard, it's crucial to consider several key features to ensure the quality and effectiveness of your setup. Let's explore the top attributes that can enhance your wildlife observation experience.
- Image and Video Quality: A good trail camera should deliver high-resolution images and clear videos. Consider cameras with pro image quality to capture vibrant photos during the day and reliable night vision capabilities for low-light conditions.
- Trigger Speed: The quickness with which a camera can capture an image once motion is detected is vital. Cameras with swift trigger speeds ensure those elusive wildlife moments are not missed.
- Detection Range: An extensive detection range allows the camera to capture movement from various distances, whether it's a deer trotting by or a small bird flitting near a bush.
- Battery Life and Power Options: Long-lasting battery life is essential, especially in secluded areas. Consider cameras that support solar panels or those with an extended year warranty for better reliability.
- Memory and Storage: Ensure the camera supports a versatile memory card to store numerous images and videos. Some models offer cellular capabilities, allowing easy set and transmission of media.
- Privacy Policy Compliance: Opt for brands that clearly outline their privacy policies, ensuring that your data and images are securely managed.
Remember, testing different models like the Spypoint Force or the Browning Strike Force Pro can help determine which camera delivers the quality and functions that suit your needs best. For further gear enhancements, consider exploring a microphone attachment for your camera setup.
Setting Up Your Wildlife Camera
How to Properly Install Your Camera System
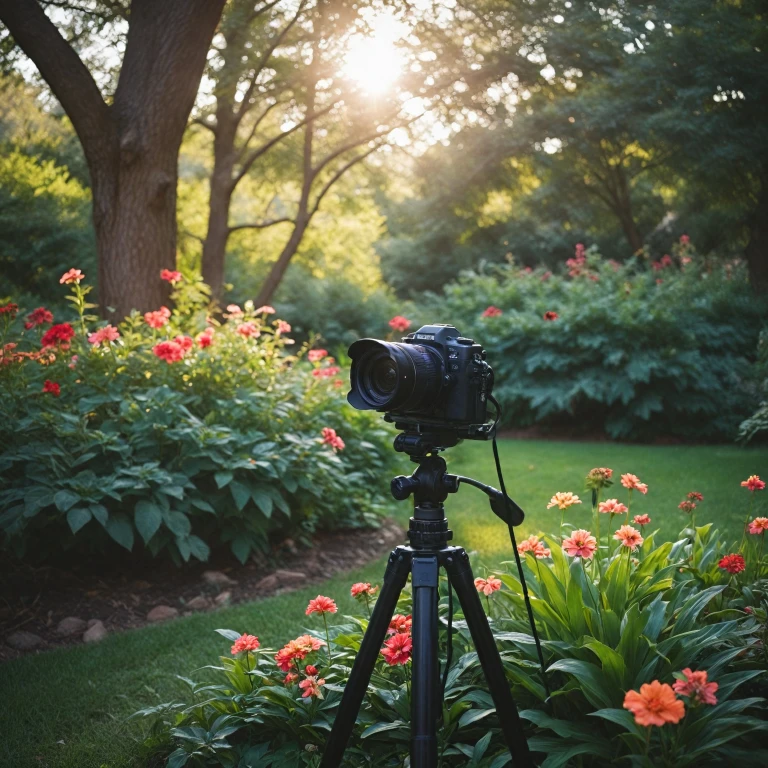
Setting up your wildlife camera requires a blend of precision and patience. To effectively capture vibrant and dynamic photos, attention to detail during the installation process is pivotal. First, determine the optimal location where wildlife activity is frequent. Consider areas near animal trails or watering holes as prime spots for your trail camera. Ensuring that your camera is positioned at the right angle can significantly influence the capture of high-quality images and videos. Using a sturdy mount or strap, secure the camera at an appropriate height. Aim for a level that aligns with the animal's line of sight, usually between knee and chest height. This positioning helps maximize the camera's trigger speed and motion detection. Options such as cellular trail cameras can provide a streamlined setup, enabling remote access and monitoring. Make sure to test the cellular connectivity before finalizing the camera’s position to avoid any reception issues. The lighting conditions must also be considered. Cameras with night vision capabilities, like the Bushnell Core or Strike Force Pro, perform well in low light. Testing the camera’s glow trail and image quality at different times of day ensures readiness for varied lighting circumstances. For those seeking an environmentally friendly option, a solar panel can be a great addition to extend battery life. A durable battery pack is essential for maintaining long-term functionality without frequent replacements. Finally, inspect and clear the surroundings of obstructions. The view should be unobstructed to prevent false triggers from blowing leaves or long grasses. For an in-depth dive into making your outdoor spaces captivating and practical, exploring the charm of a wildlife camera can provide further inspiration and guidance.Capturing Stunning Images
Photographing Wildlife: Techniques for Stunning Images
To capture the beauty of nature in your backyard, you need more than just a good trail camera; it's about employing techniques that ensure your images stand out. Let's explore some proven methods to make the best out of your wildlife photography experience.- Optimize Your Placement: Location is everything when it comes to photographing wildlife. Identify natural trails that animals frequently use. Set up your trail camera in these areas, ensuring it is stable and well-camouflaged to avoid startling animals. The best trail camera positioning can significantly enhance the quality of your captures.
- Focus on Image Quality: High-quality images are a result of factors like good lighting and precise camera settings. While nighttime photography is often challenging, trail cameras with advanced night vision capabilities, such as the browning strike force pro, ensure clarity even in low light. Pay attention to the camera's specification for image quality to get the sharpest photos.
- Consider Trigger Speed: Wildlife moves fast. A camera with a quick trigger speed ensures you won't miss a beat. Capture those candid moments with ease and accuracy. The faster the trigger, the better your chances of getting that perfect shot.
- Utilize Video Mode: For dynamics in your imagery, try using the video function. Wildlife cameras like the core glow trail cameras provide excellent video quality, allowing you to capture movements you wouldn't notice in still photographs.
- Perform Regular Testing: Test your equipment before leaving it to ensure everything is functioning correctly. From the camera settings to the battery life, ensure your digital equipment is ready for an extended stay outdoors.
Maintaining Your Wildlife Camera
Maintenance Essentials for Your Wildlife Camera
Taking care of your trail camera is crucial to ensure it continues capturing breathtaking images of backyard wildlife. Here's a guide on how to maintain your wildlife camera effectively:
- Regular Cleaning: Dirt and debris can obscure lenses and affect image quality. Use a soft cloth to clean the lens gently. For more stubborn grime, a camera lens cleaner can come in handy.
- Check Battery Life: Before heading out for the next set, verify the battery life. For consistent performance, consider using rechargeable batteries or a solar panel to extend the camera's operation time.
- Secure the Camera: Make sure it's securely mounted to withstand varying weather conditions and potential interference from animals.
- Memory Card Management: Regularly check the card to ensure it's not full and transfer photos to a secure location. Opt for a high-quality memory card to handle numerous images and videos without compromising on performance.
- Software Updates: If your camera comes with a software update feature, ensure it's up-to-date to enjoy the latest improvements, such as enhanced night vision or quicker trigger speed.
- Field Testing: Routinely conduct field testing to verify features like glow trail and night vision. This step can also optimize functionality and image quality.
- Inspect for Damage: Look for any physical damage or wear and tear. A year warranty might cover repairs for some issues, but regular inspections will help you catch problems early.
By following these maintenance tips, you can ensure that your best trail camera continues to capture striking wildlife videos and photos all year round, helping you make the most out of your investment.
Analyzing and Sharing Your Wildlife Photos
Editing and Organizing Wildlife Photographs
After a successful excursion with your wildlife camera, you'll likely have a collection of stunning images and videos showcasing the beauty of nature. The next step is to evaluate the quality and select the best ones for sharing. Here's how you can effectively analyze and present your captures.
Image Processing Tools
Using digital editing software can enhance image quality, helping you bring out the best in your photos. Whether capturing the core glow of a bird or the sharpness of a deer's antlers, tools such as Adobe Lightroom or Capture One can be invaluable. These programs allow photo refinements like adjusting exposure, contrast, and color balance to make your snapshots pop, especially for images recorded in night vision mode.
Video Enhancement
Many trail cameras, including models like the Bushnell Core and Spypoint Force, provide high-quality video footage. If your device supports 4K resolution, you'll be in a prime position to showcase crisp wildlife behavior. Professional video editing software can help edit segments, adding transitions or soundtracks to make a more captivating story.
Organizing for Easy Access
- Label and Categorize: Develop a system for tagging your photos and videos, such as by species or location, to streamline your workflow for future browsing and adjustments.
- Cloud Storage: A cloud service or digital repository offers security and easy access to your files from any device. Such storage solutions also help keep your memory card from filling up too quickly.
Share with Enthusiasts
Once your wildlife masterpiece is ready, sharing them with the community can be both rewarding and educational. Platforms like photography forums or social media groups provide spaces to showcase your work and gather feedback. Remember to respect privacy policies regarding content sharing, especially if using images captured by trail cameras with cellular capabilities.
By following these guidelines, you not only preserve your memories but also contribute to wildlife appreciation by sharing intriguing stories through visual art.